Open User Management
Click your profile icon at the bottom-left of the sidebar, then select Settings.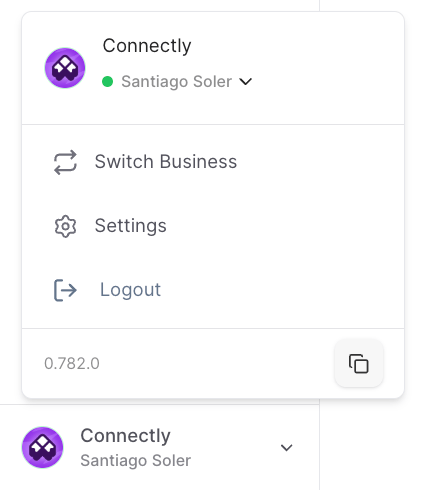
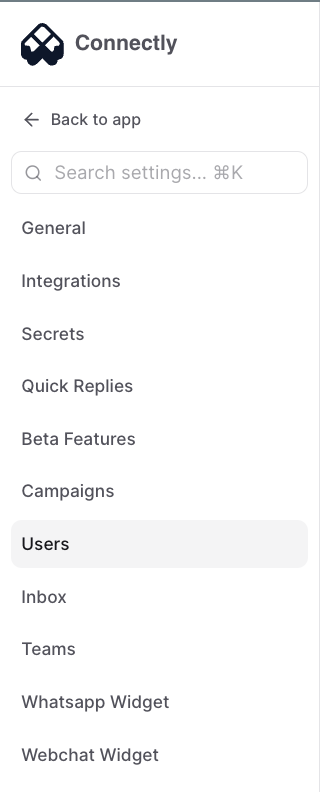

Only Owners can add users, change roles, or remove users. Everyone else sees the user list in read-only mode.
Roles
Every user has exactly one role. The role determines which parts of Connectly they can access.Feature access by role
What each role can do in detail
Owner — full workspace administrator
Owner — full workspace administrator
Owners have unrestricted access to every feature. On top of what Marketing users can do, Owners are the only role that can:
- Manage users — add, remove, and change roles from Settings → Users.
- Access API keys — view and manage secrets in Settings → Secrets.
- Configure notifications — set up notification preferences in Settings → Notification Settings.
Marketing — full access without admin controls
Marketing — full access without admin controls
Marketing users see every section in the sidebar and can manage day-to-day operations:
- Inbox — view all conversations, assign and reassign tickets, reply, resolve, and reopen.
- Campaigns — create, schedule, and send broadcast campaigns.
- Automations & Flows — build and manage automation workflows.
- Audiences — create and manage customer segments.
- Analytics — view all dashboards and reports. Cannot edit report configurations.
- AI Agents / Sofia — configure AI agents and Sofia AI.
- Templates — create and manage message templates.
- Tools & Sign-up Units — manage external tools and registration forms.
- Teams — create teams, add members, and manage folders.
- Settings — access General, Integrations, Quick Replies, Campaigns, Users (read-only), Inbox, Teams, and widget settings.
- Add, remove, or change user roles (read-only on the Users page).
- Access API keys (Secrets tab is hidden).
- Edit analytics report configurations.
Agent — inbox-focused with scoped visibility
Agent — inbox-focused with scoped visibility
Agents are designed for frontline work. Their sidebar shows only Inbox, Teams, and Settings.Inbox access:
- Agents see only conversations assigned to them or their teams — not the full conversation list.
- The All and Sofia AI tabs are hidden. Agents work from My Tasks and Requires Agent.
- Agents can reply, resolve, and reopen their assigned tickets.
- General — edit their own profile and change their password.
- Quick Replies — view and use quick replies.
- Integrations, Campaigns, Inbox, Teams, Whatsapp Widget — visible but may be read-only depending on the setting.
- Users — visible in read-only mode (no add/remove/change role).
- Secrets and Notification Settings — hidden.
- See conversations outside their assignment scope.
- Create or manage campaigns, automations, audiences, or templates.
- Access analytics dashboards (except their own performance if the page is reachable).
- Manage users or access API keys.
Analytics — reports and dashboards only
Analytics — reports and dashboards only
The Analytics role is purpose-built for users who need data without operational access.
- Analytics — full access to all dashboards, metrics, and reports. Can edit and customize report configurations.
- No sidebar sections other than Analytics are visible — no Inbox, Campaigns, Automations, Settings, or Teams.
- Access the Inbox or interact with any conversation.
- Create or send campaigns.
- Manage users, teams, or any workspace setting.
Settings pages by role
Not all Settings pages are visible to every role:The Analytics role does not have access to Settings at all.
Add a user
- Click Add User at the top-right of the Users page.
- Fill in the form:
- Email — the new user’s email address.
- Password — a temporary password for the user’s first login. They can change it later in Settings → General.
- Role — choose one of the four roles. Defaults to Agent.
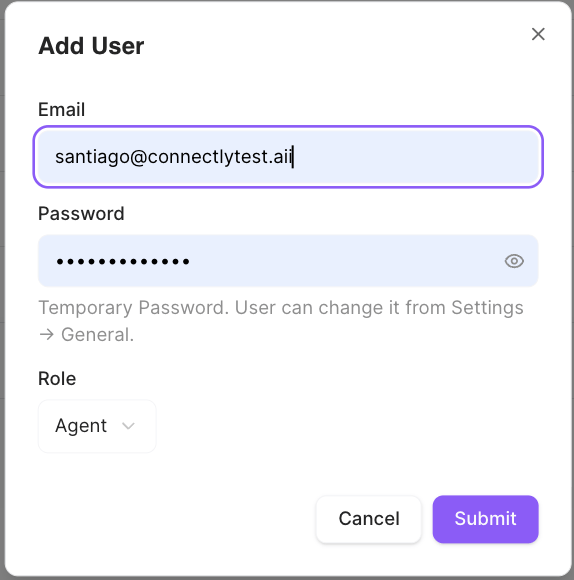
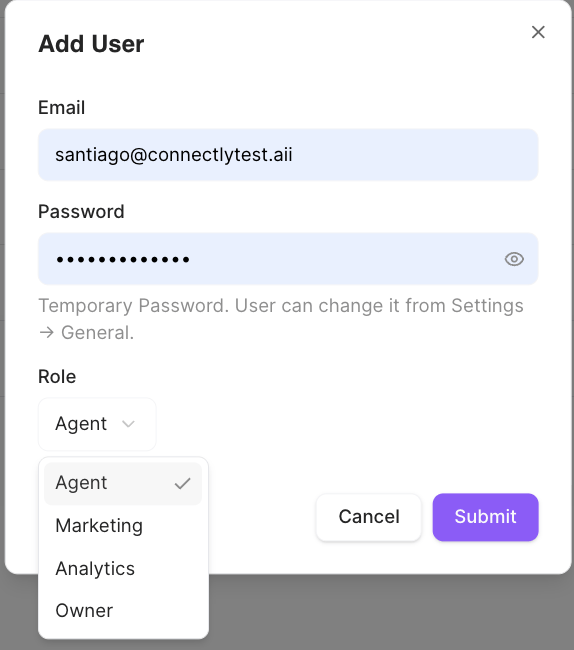
- Click Submit.
Change a user’s role
- Hover over the user’s row to reveal the ⋮ menu on the right.

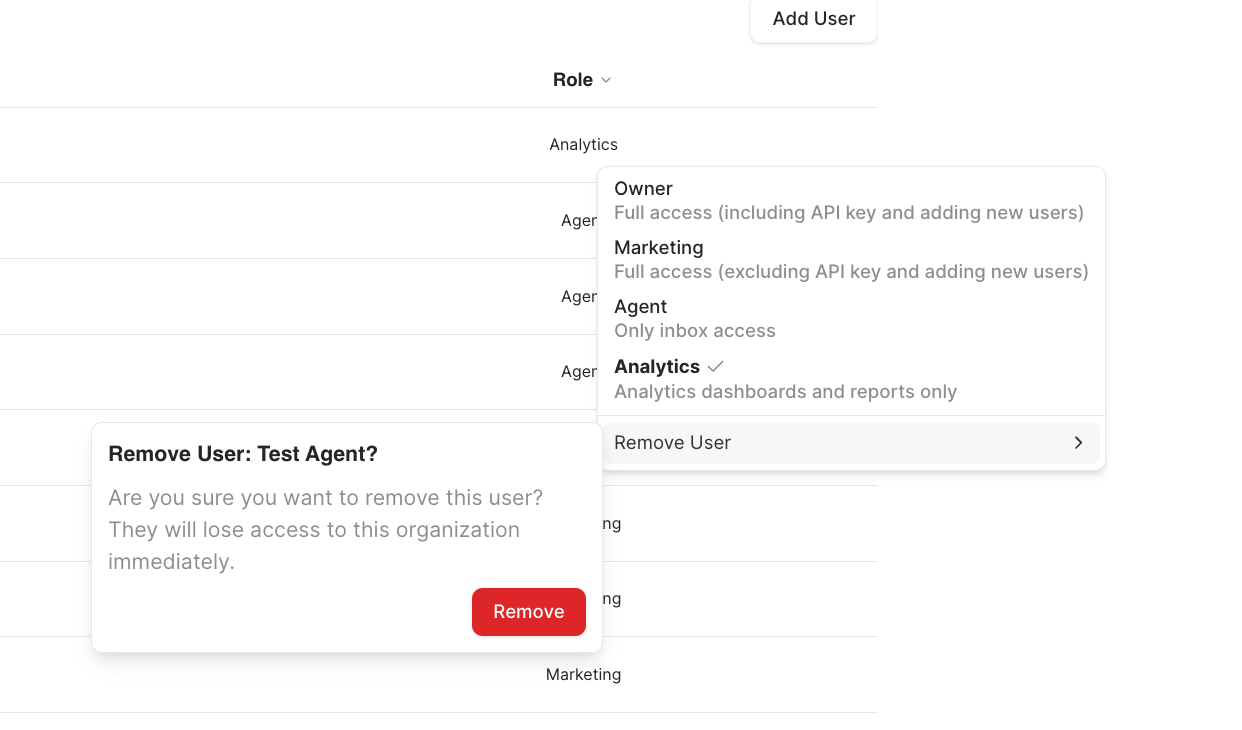
- Click the ⋮ menu. Select the new role from the list — each option shows a short description and a checkmark next to the current role.
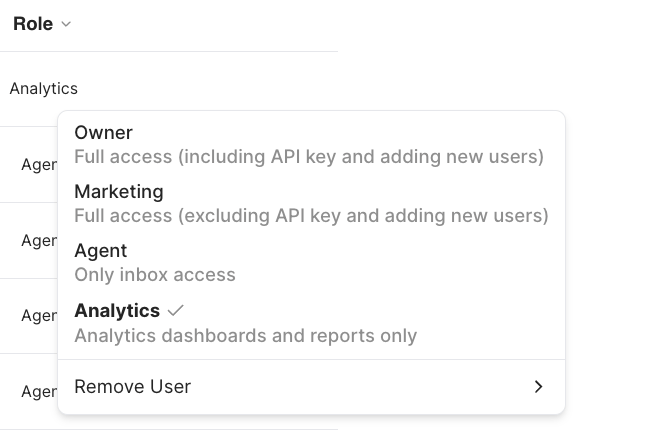
Remove a user
- Hover over the user’s row and click the ⋮ menu.
- Click Remove User at the bottom of the menu.
- A confirmation panel appears with the user’s name. Click the red Remove button to confirm.