> ## Documentation Index
> Fetch the complete documentation index at: https://docs.connectly.ai/llms.txt
> Use this file to discover all available pages before exploring further.
# Klaviyo
> Trigger WhatsApp campaigns from Klaviyo flows using the Connectly API — set up webhooks, map variables, and automate customer messaging from your e-commerce data 🛍️
Klaviyo is a marketing automation platform built for e-commerce. When connected to Connectly and an e-commerce platform like Shopify, you can use real-time customer data to trigger highly targeted WhatsApp campaigns automatically.
## Use cases
Greet new customers when they subscribe or make their first purchase, setting a positive tone for future interactions.
Send reminders to customers about items left in their cart to reduce abandonment rates and recover lost sales.
Send automated order confirmations and real-time shipping updates to keep customers informed post-purchase.
Build loyalty with a personalised thank you message after purchase, and follow up with a feedback or survey request.
Foster personal relationships by celebrating customer birthdays and first-purchase anniversaries with special messages and promotions.
***
## Requirements
* A Connectly account with a working WhatsApp business number
* A Klaviyo account
* An e-commerce or CRM platform integrated with Klaviyo (e.g. Shopify, Salesforce, Magento, Wix, WooCommerce — [see the full list](https://www.klaviyo.com/integrations))
***
## Setup
### Step 1: Get your Connectly API key
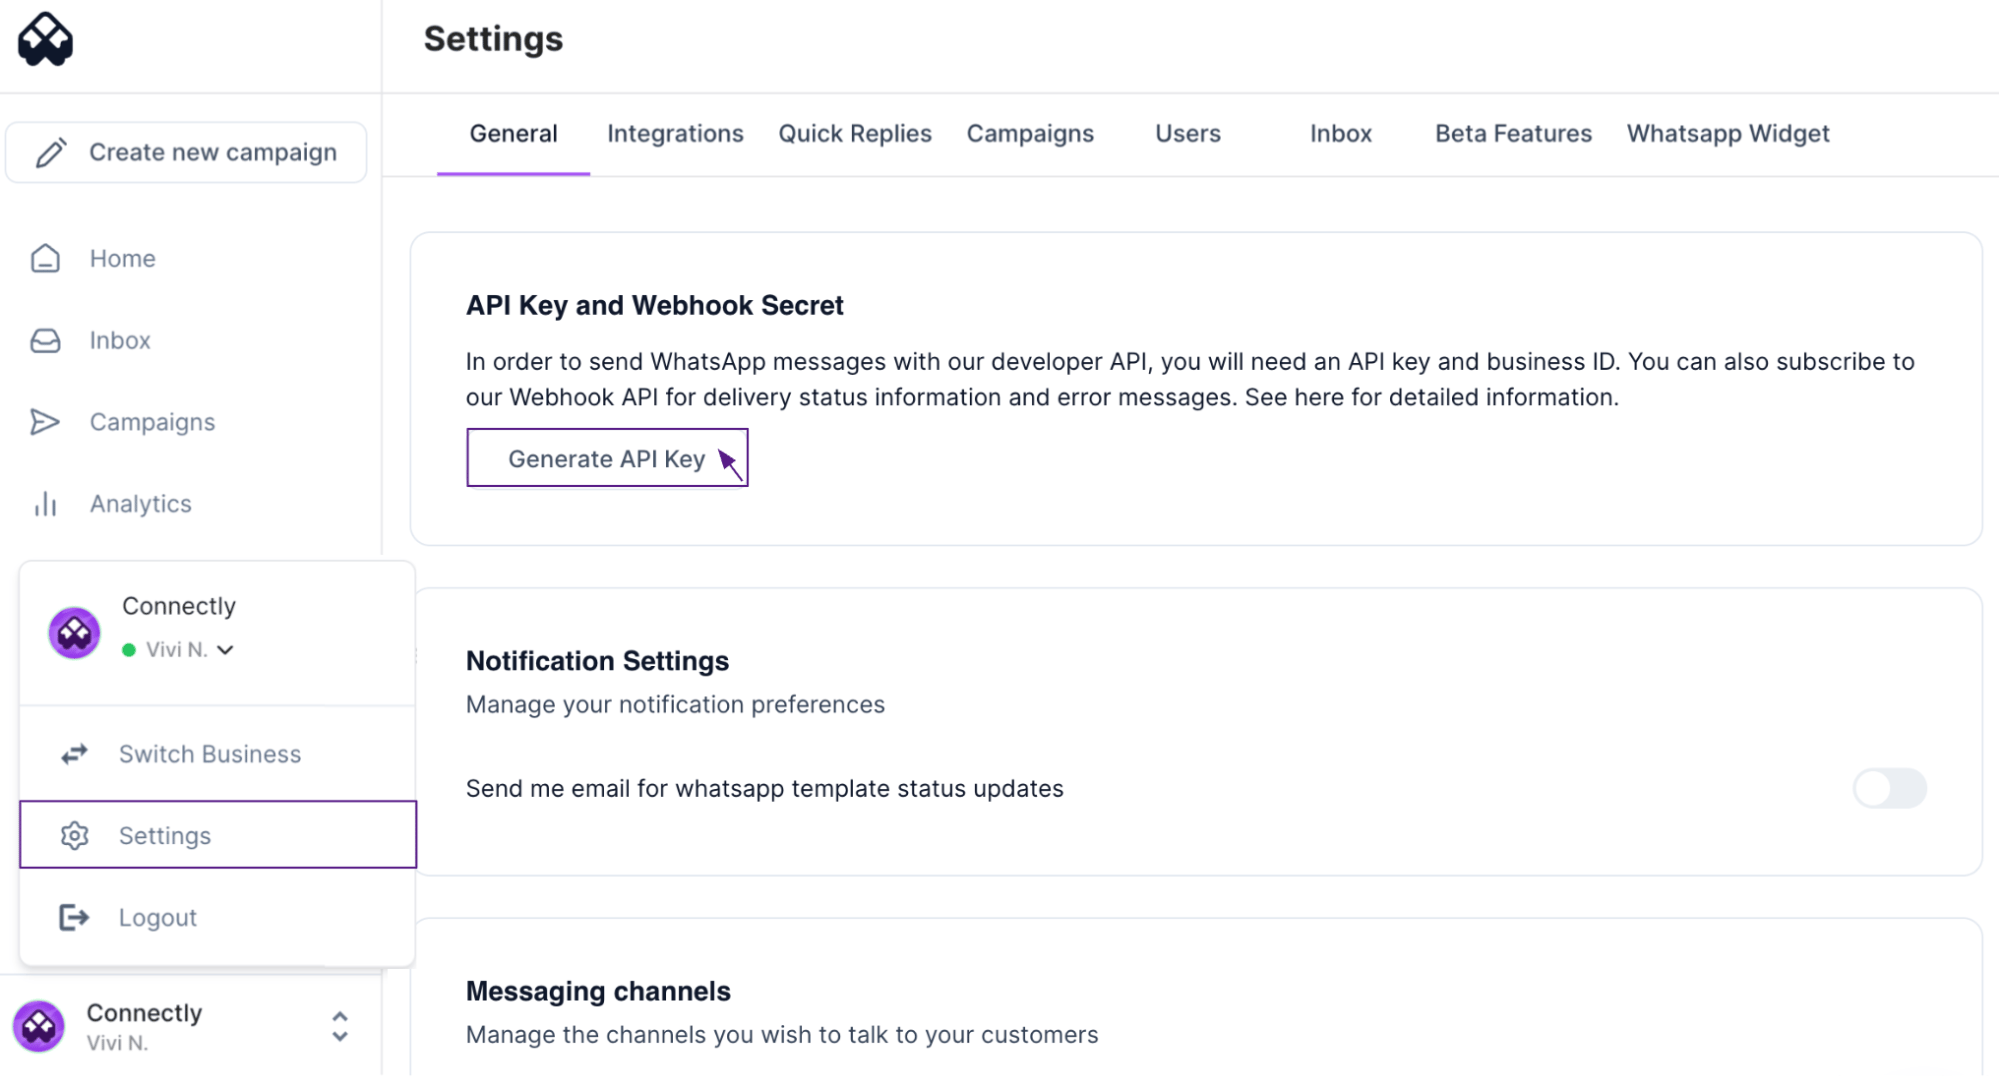
In the Connectly platform, go to **Settings → General** and scroll down to **API Key and Webhook Secret**. Click **Generate API Key**.
 Click **Create API Key** to generate and display your key.
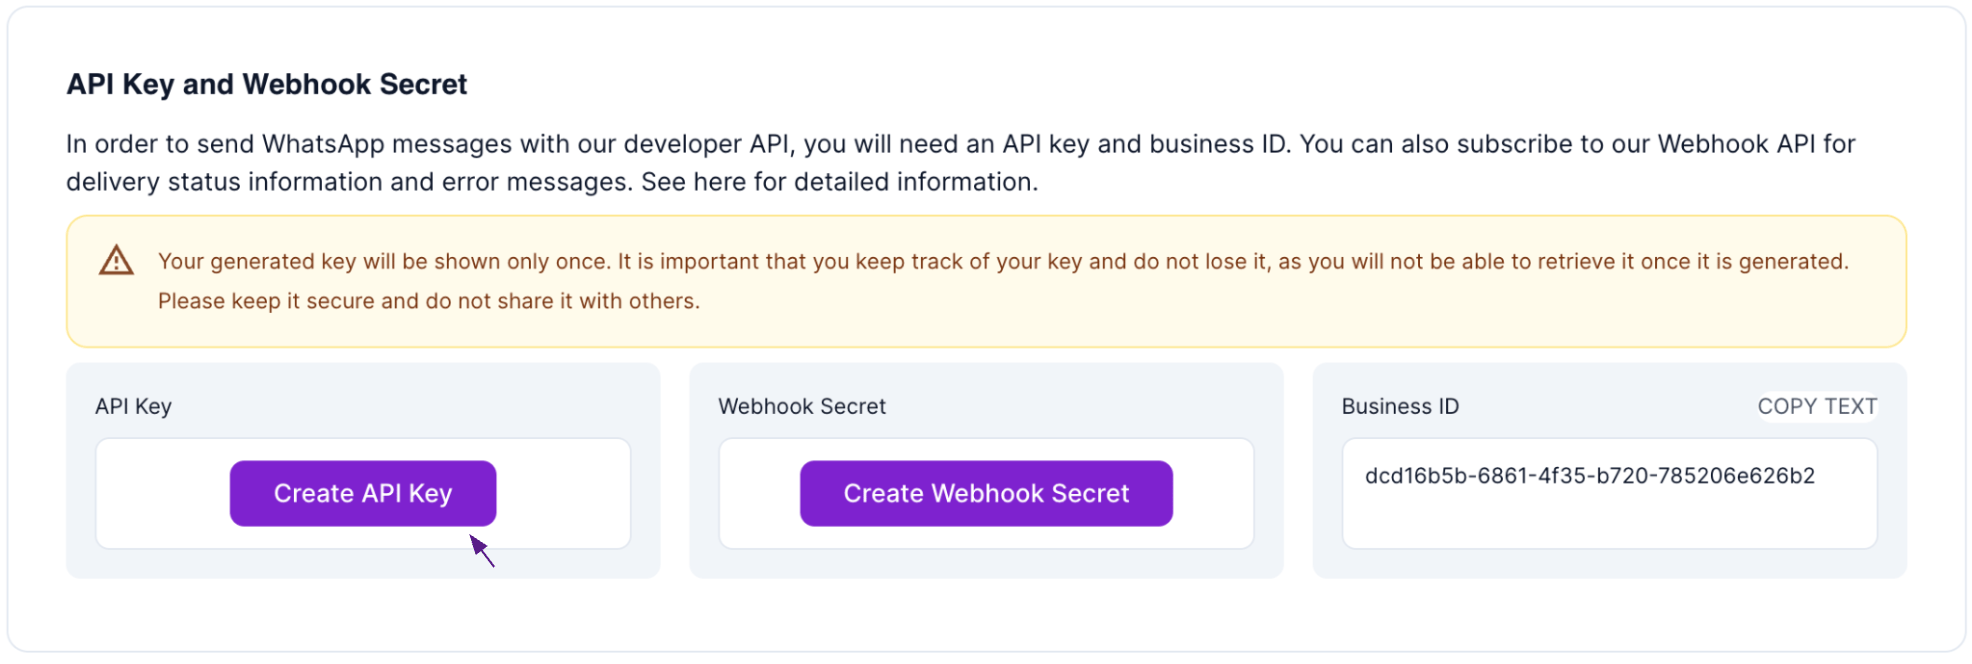 The API key is shown **only once**. Copy it immediately and store it somewhere secure (e.g. a password manager). Generating a new key will invalidate the previous one.
***
### Step 2: Get your campaign destination URL and JSON body
You need the campaign's endpoint URL and JSON payload to configure the Klaviyo webhook.
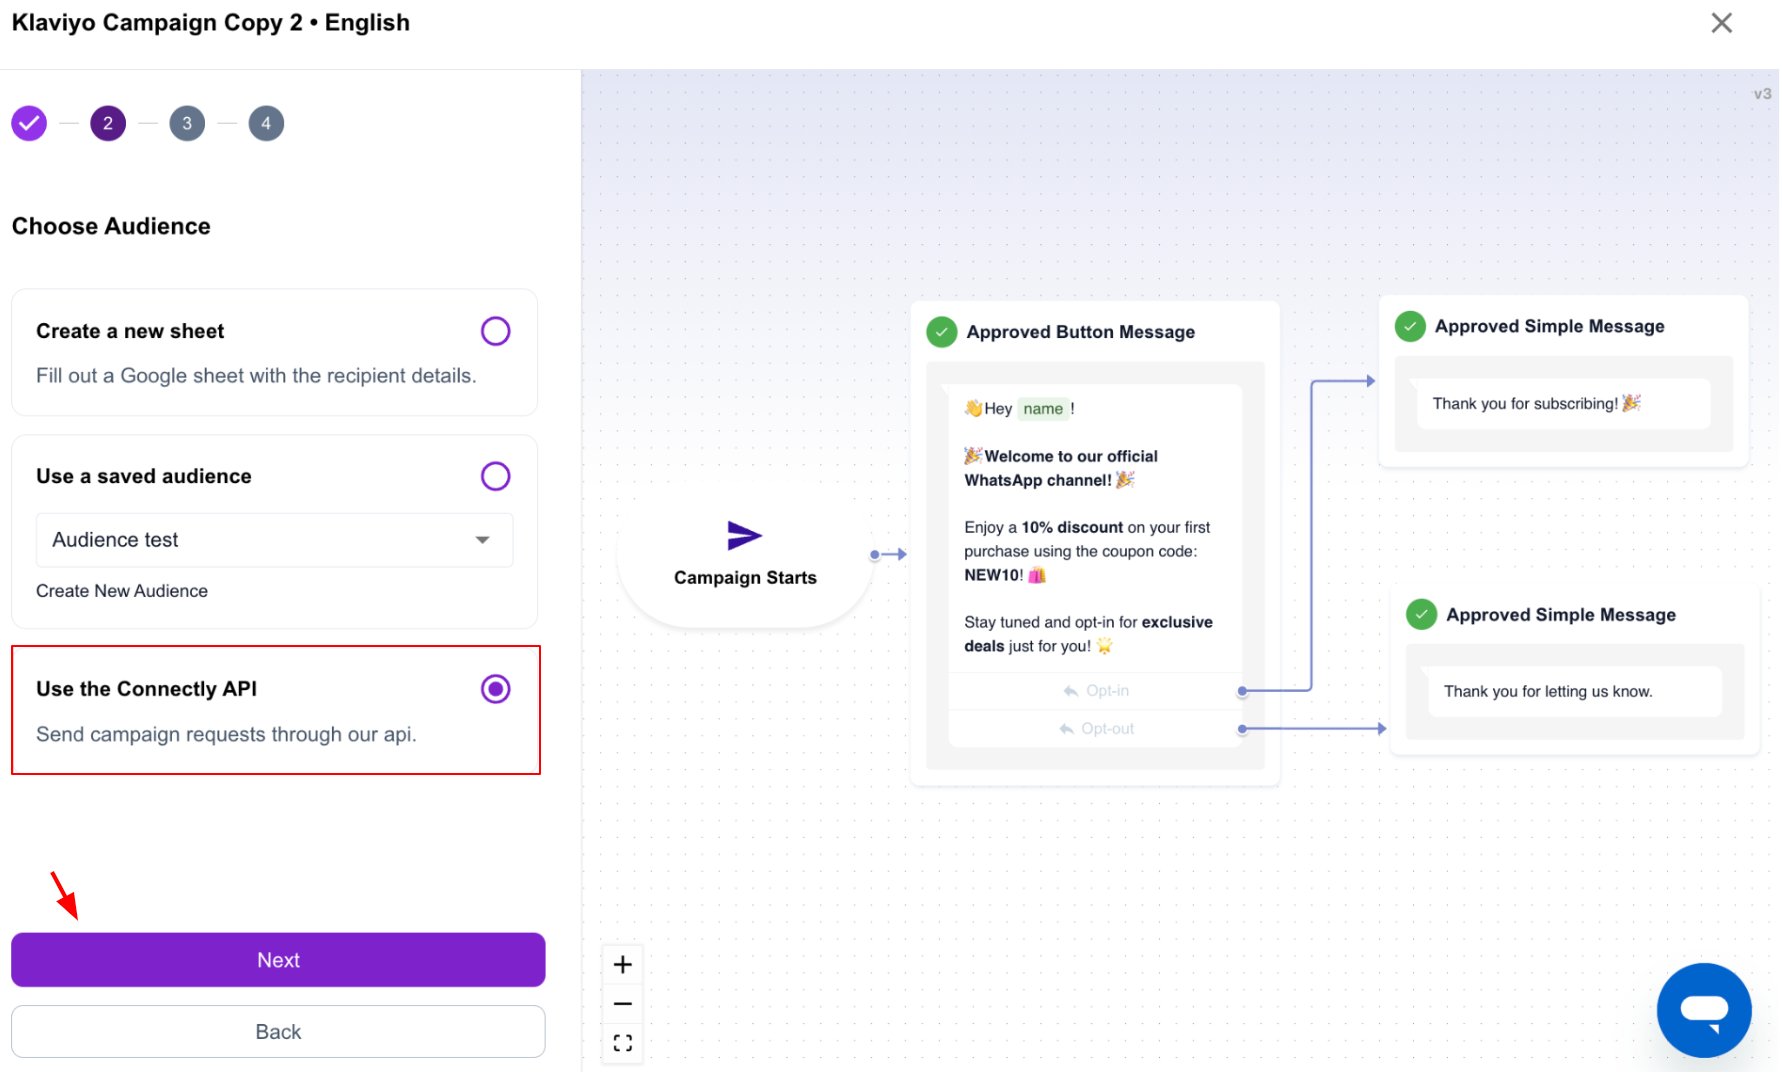
When setting up a new campaign, select **"Use the Connectly API"** on the **Choose Audience** step and click **Next**.
The API key is shown **only once**. Copy it immediately and store it somewhere secure (e.g. a password manager). Generating a new key will invalidate the previous one.
***
### Step 2: Get your campaign destination URL and JSON body
You need the campaign's endpoint URL and JSON payload to configure the Klaviyo webhook.
When setting up a new campaign, select **"Use the Connectly API"** on the **Choose Audience** step and click **Next**.
 Navigate to the **Campaigns** section and click the **`<>`** icon next to the campaign you want to connect.
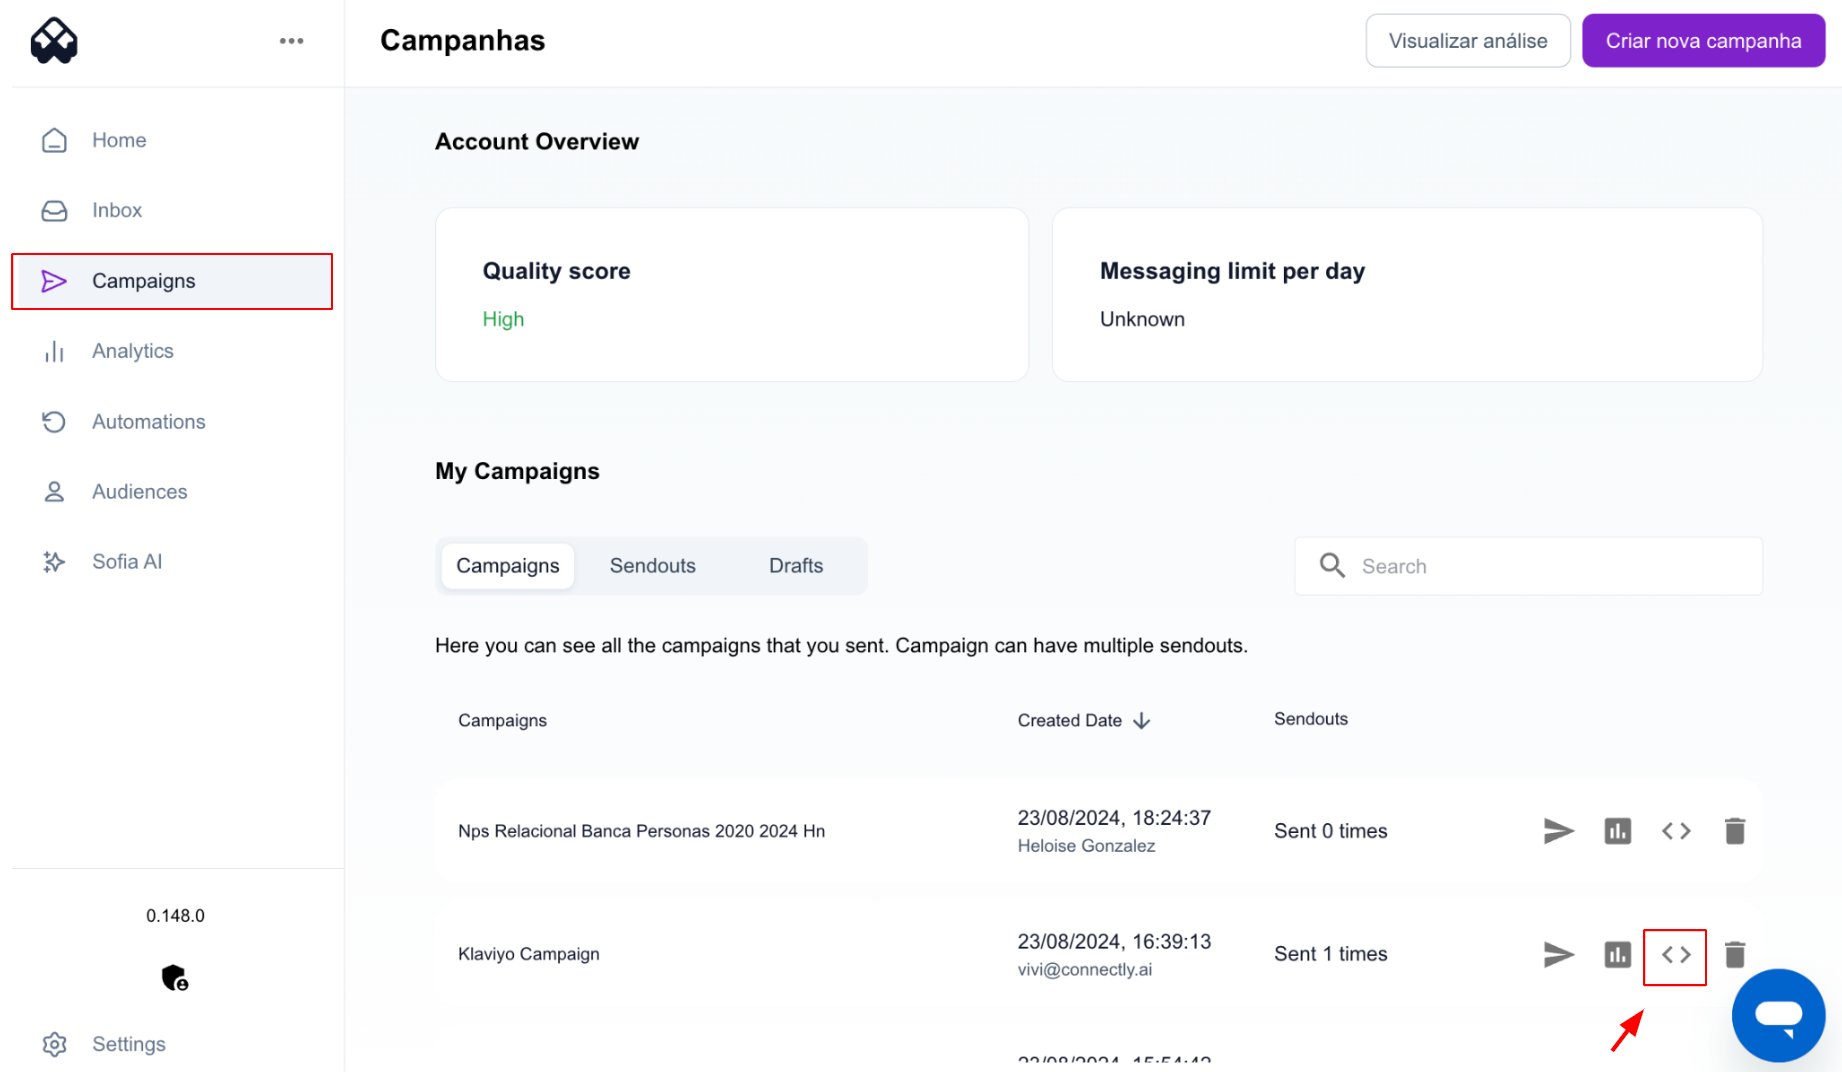 Both options display the **Curl Snippet** panel with your destination URL and JSON body highlighted.

 ***
### Step 3: Create a flow in Klaviyo
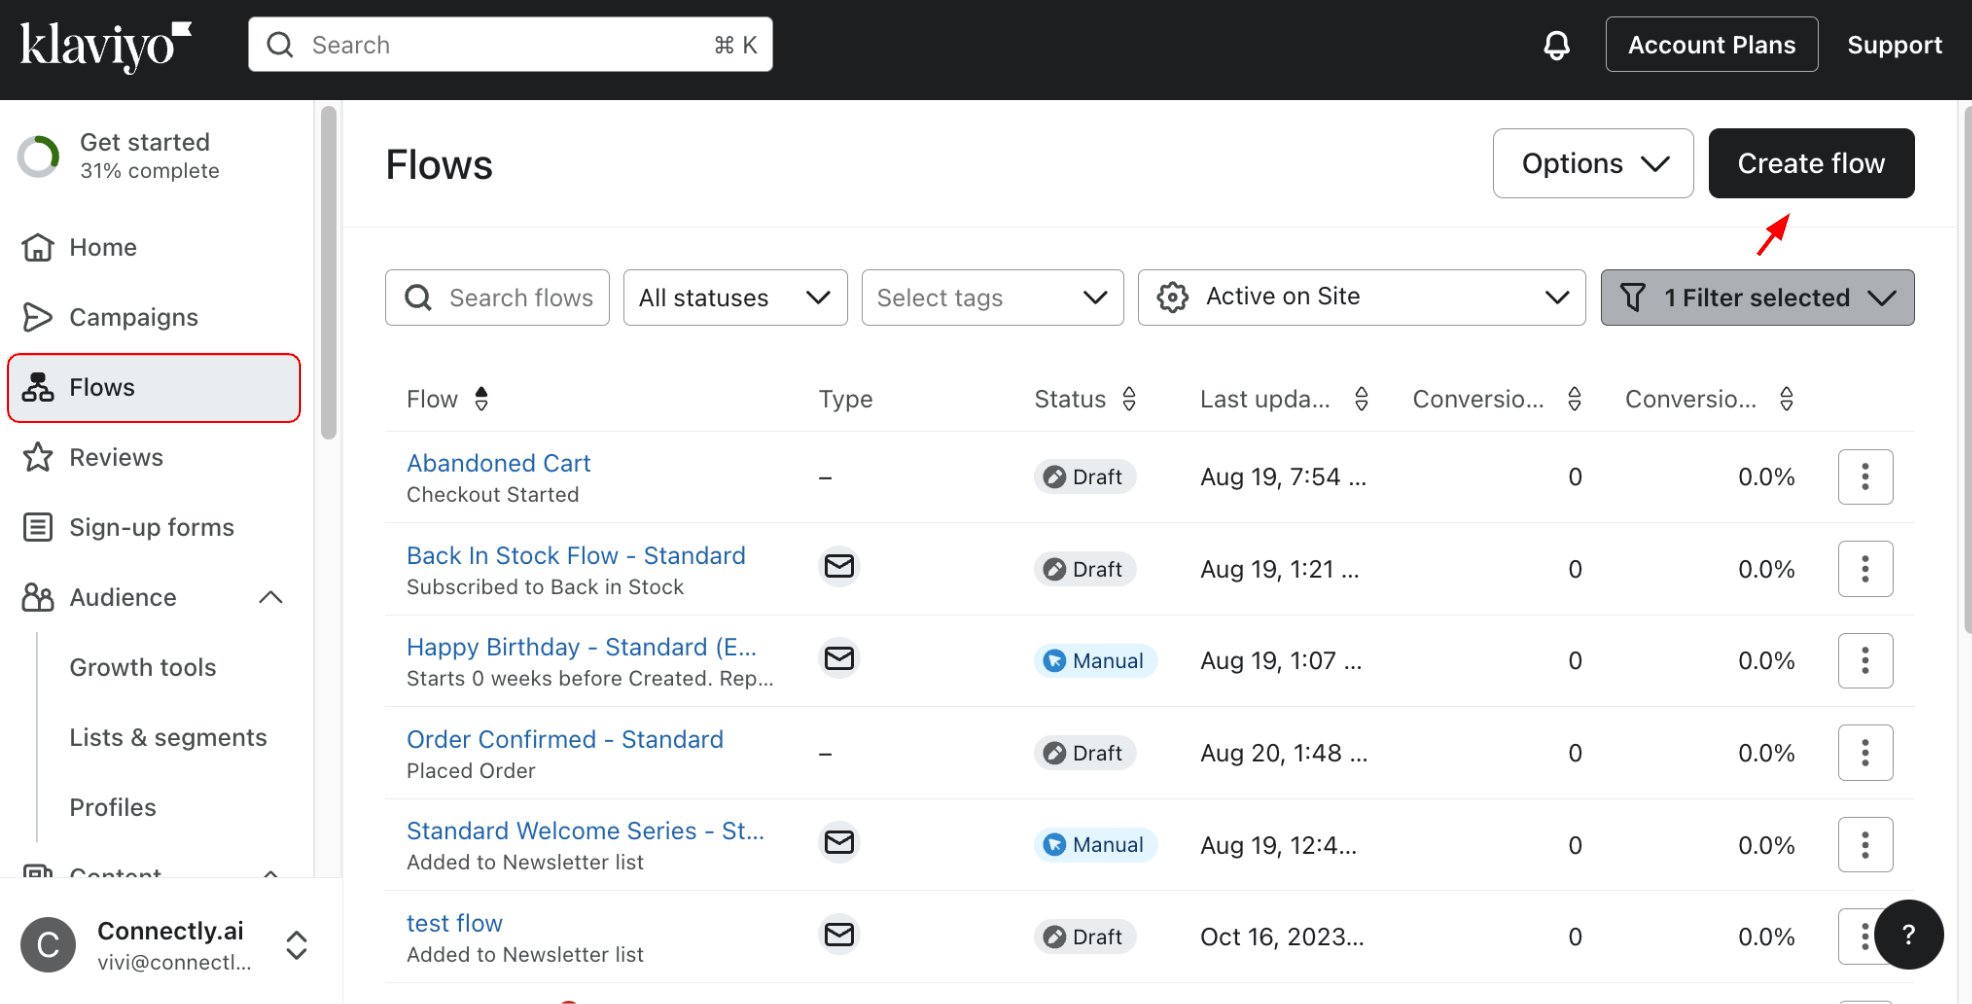
Log into Klaviyo, navigate to **Flows**, and click **Create Flow**.
***
### Step 3: Create a flow in Klaviyo
Log into Klaviyo, navigate to **Flows**, and click **Create Flow**.
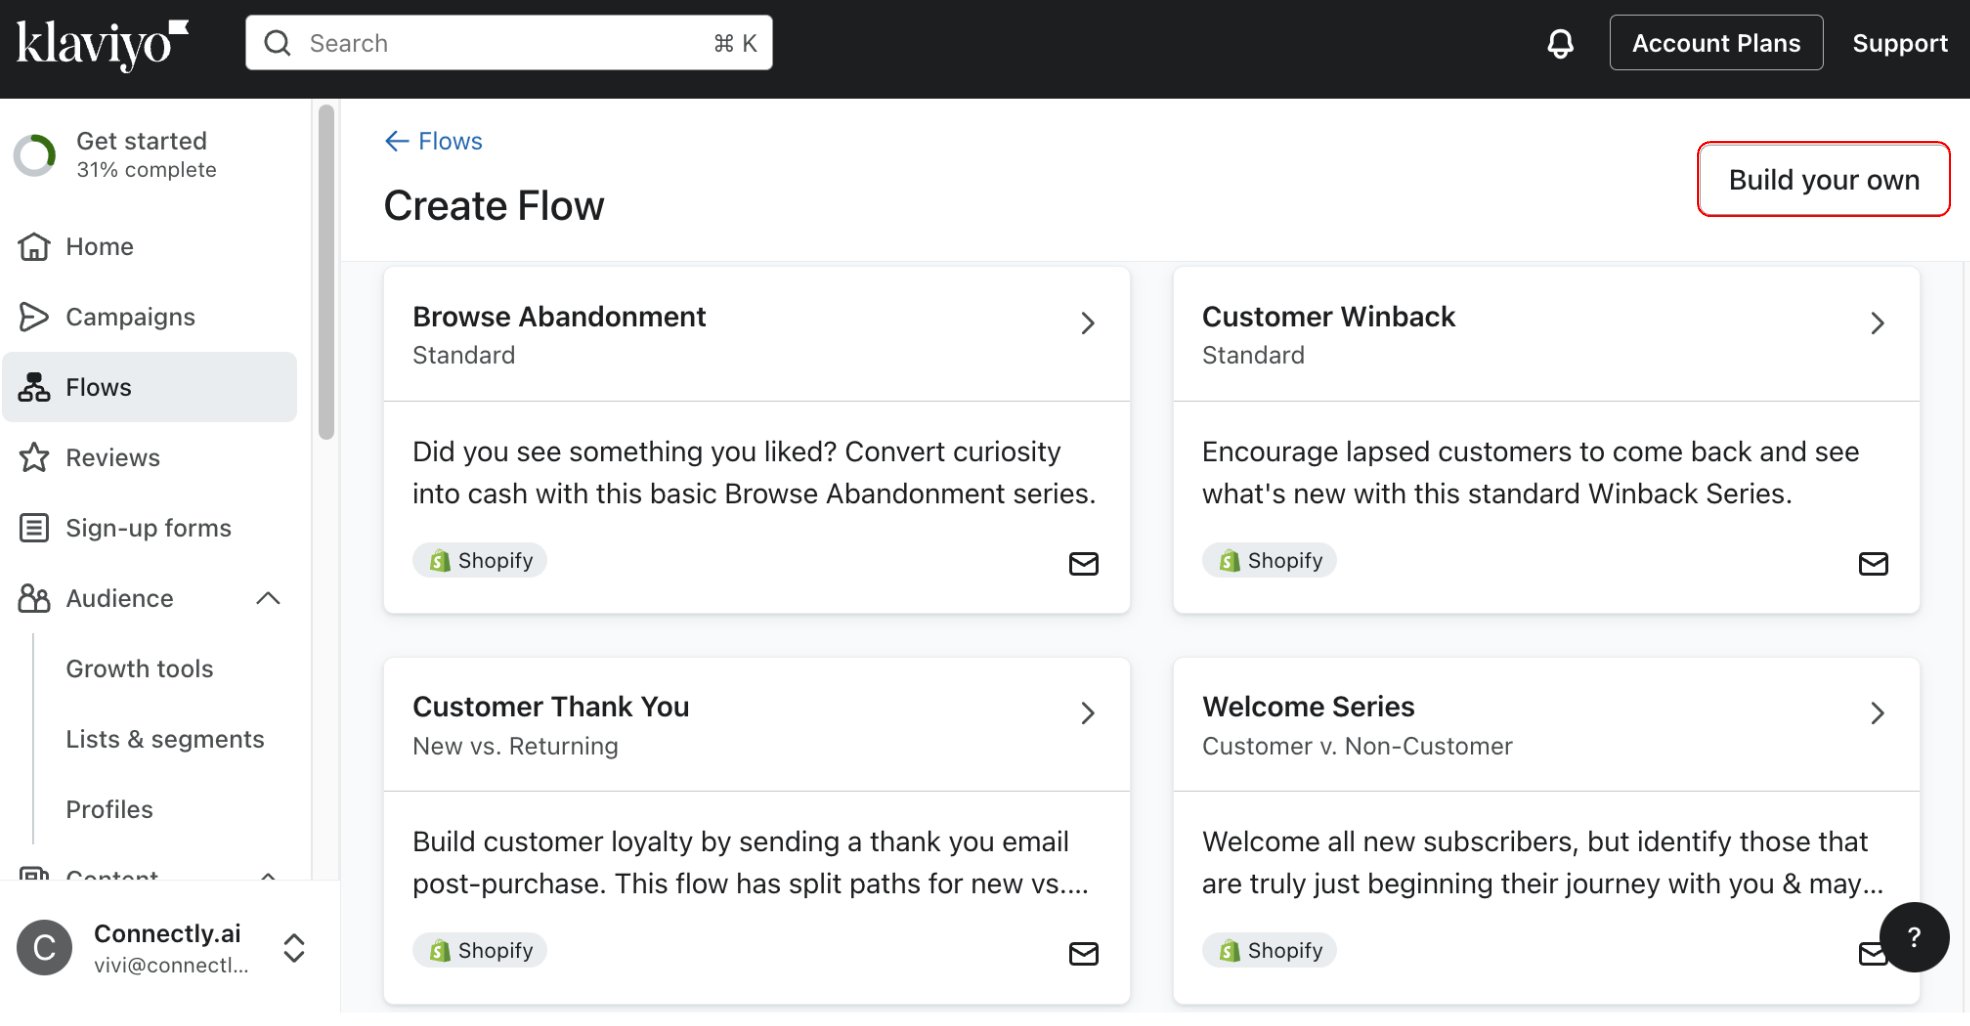
 Choose an existing template or click **Build your own** to set up a custom trigger and filters.
 ***
### Step 4: Add and configure the Webhook node
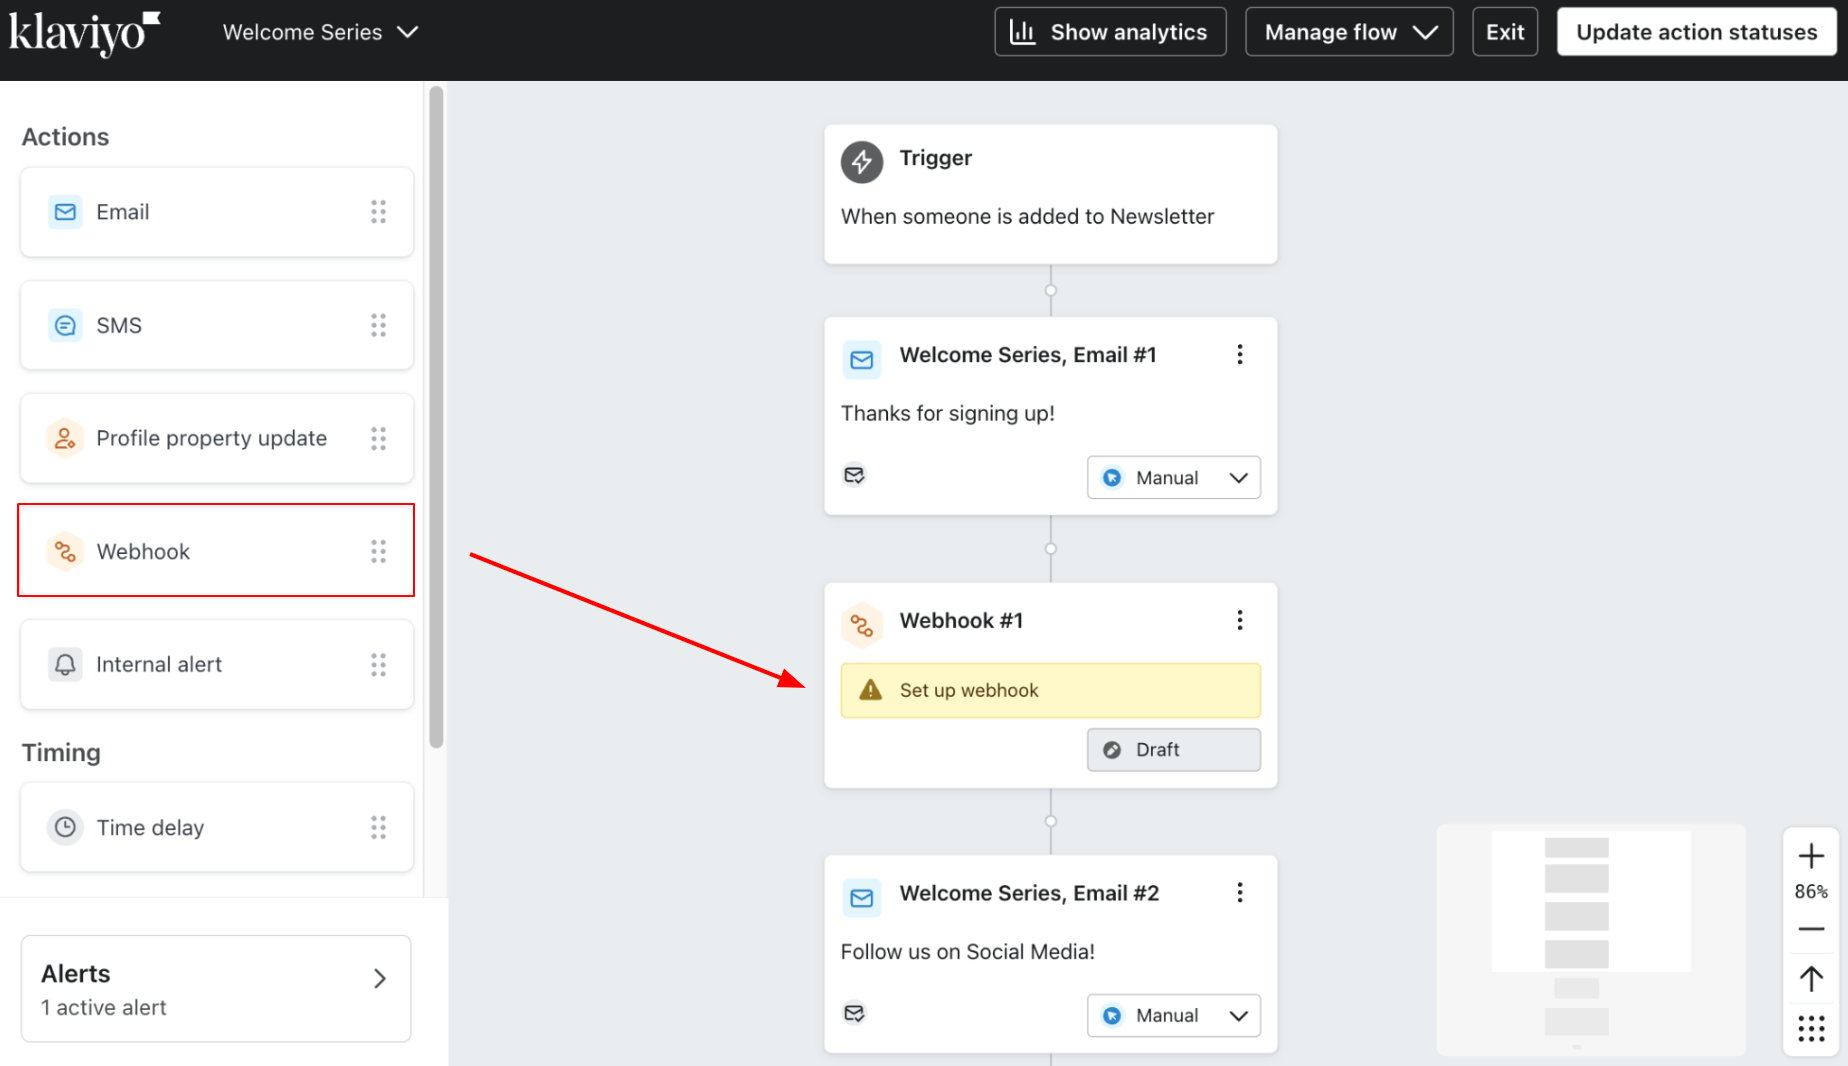
Drag the **Webhook** node from the left sidebar and drop it into your flow at the point where you want the WhatsApp campaign to be triggered.
***
### Step 4: Add and configure the Webhook node
Drag the **Webhook** node from the left sidebar and drop it into your flow at the point where you want the WhatsApp campaign to be triggered.
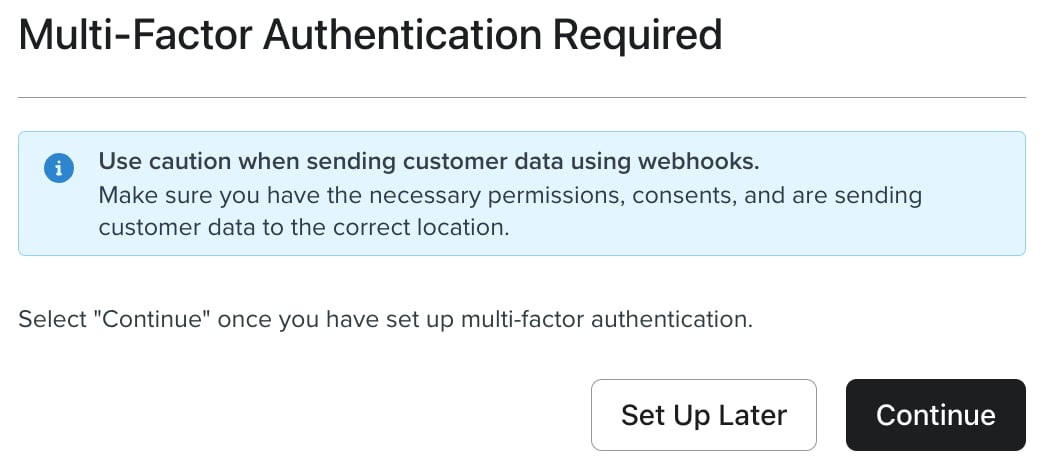
 If this is your first time using the Webhook node, Klaviyo will prompt you to set up Multi-Factor Authentication before proceeding.
 Click on the Webhook node to open its settings panel. Fill in the following fields:
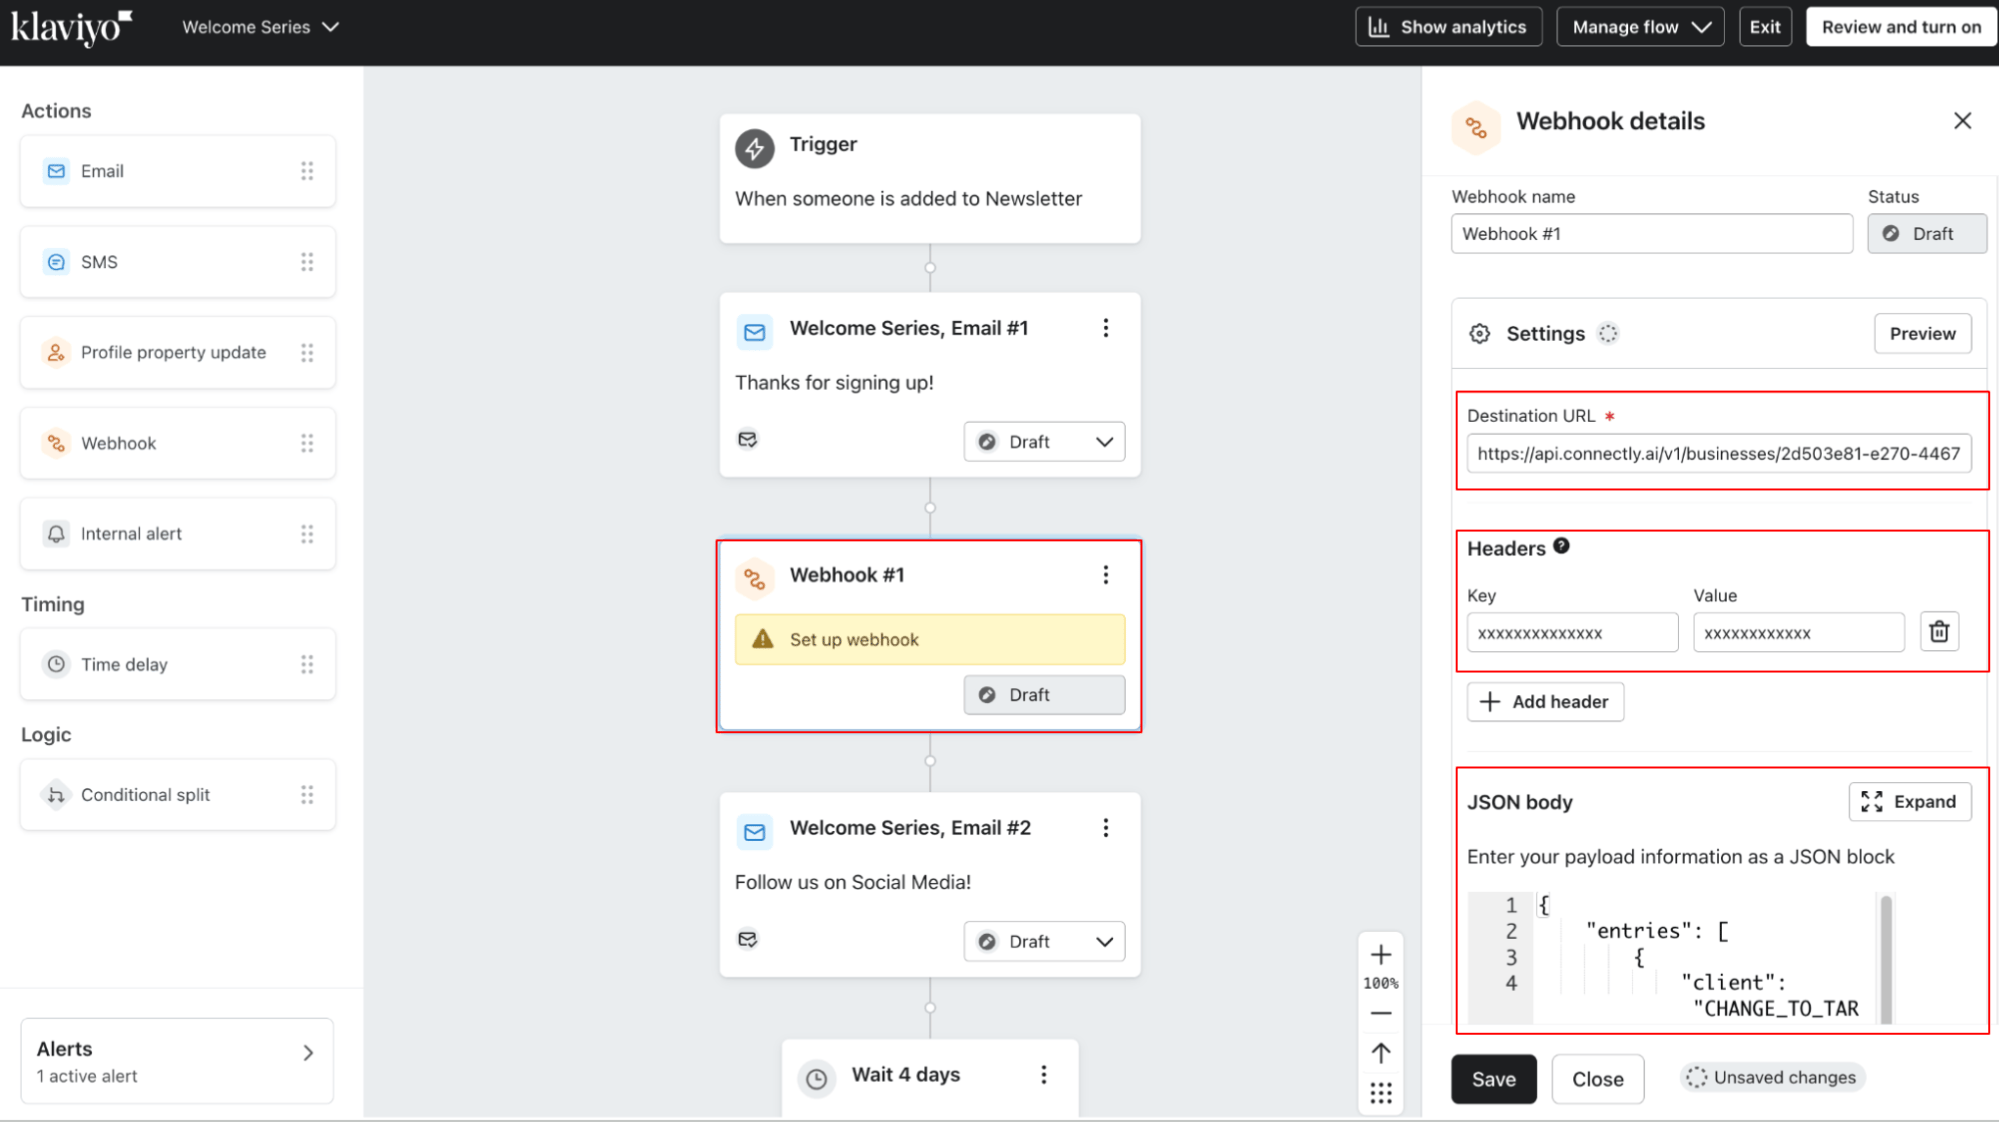 | Field | Value |
| ------------------- | ---------------------------------------------------------- |
| **Destination URL** | The URL from your Connectly campaign curl snippet |
| **Headers — Key** | `x-api-key` |
| **Headers — Value** | Your Connectly API key |
| **JSON body** | The JSON payload from your Connectly campaign curl snippet |
***
### Step 5: Map campaign variables
Your JSON body contains placeholder values that need to be replaced with Klaviyo profile properties.
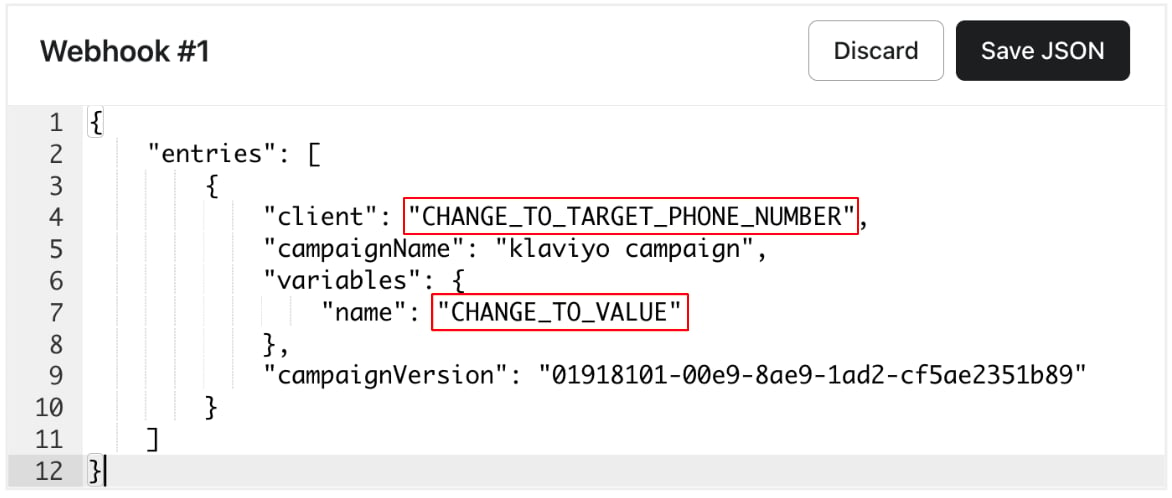
In the webhook settings panel, click the **Expand** icon on the JSON body section to see the full payload. Each value marked `CHANGE_TO_*` needs to be replaced.
| Field | Value |
| ------------------- | ---------------------------------------------------------- |
| **Destination URL** | The URL from your Connectly campaign curl snippet |
| **Headers — Key** | `x-api-key` |
| **Headers — Value** | Your Connectly API key |
| **JSON body** | The JSON payload from your Connectly campaign curl snippet |
***
### Step 5: Map campaign variables
Your JSON body contains placeholder values that need to be replaced with Klaviyo profile properties.
In the webhook settings panel, click the **Expand** icon on the JSON body section to see the full payload. Each value marked `CHANGE_TO_*` needs to be replaced.
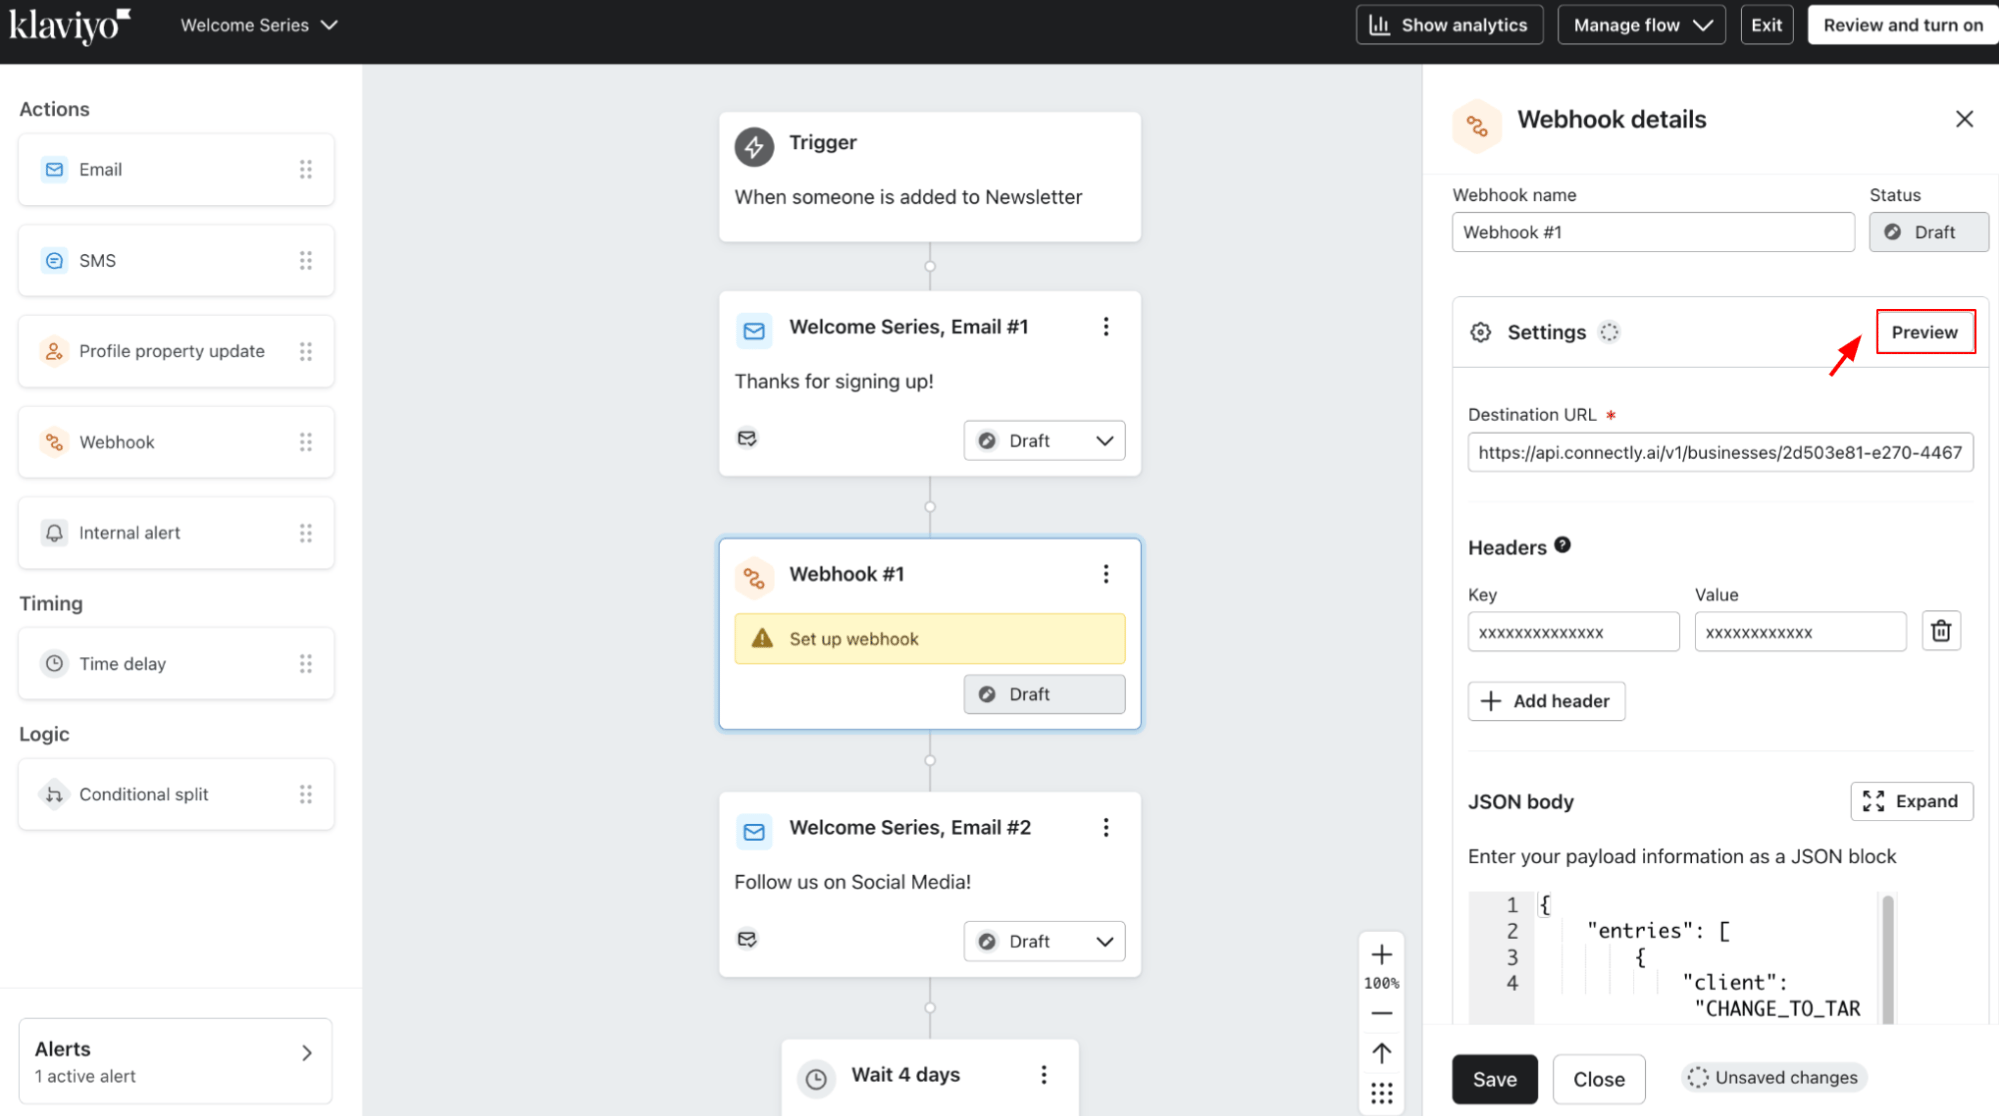
 Click the **Preview** button in the Settings panel header. The **Preview Profile Info** panel appears, showing all available profile properties. Hover over any property to reveal its Klaviyo variable name, then click to copy it.
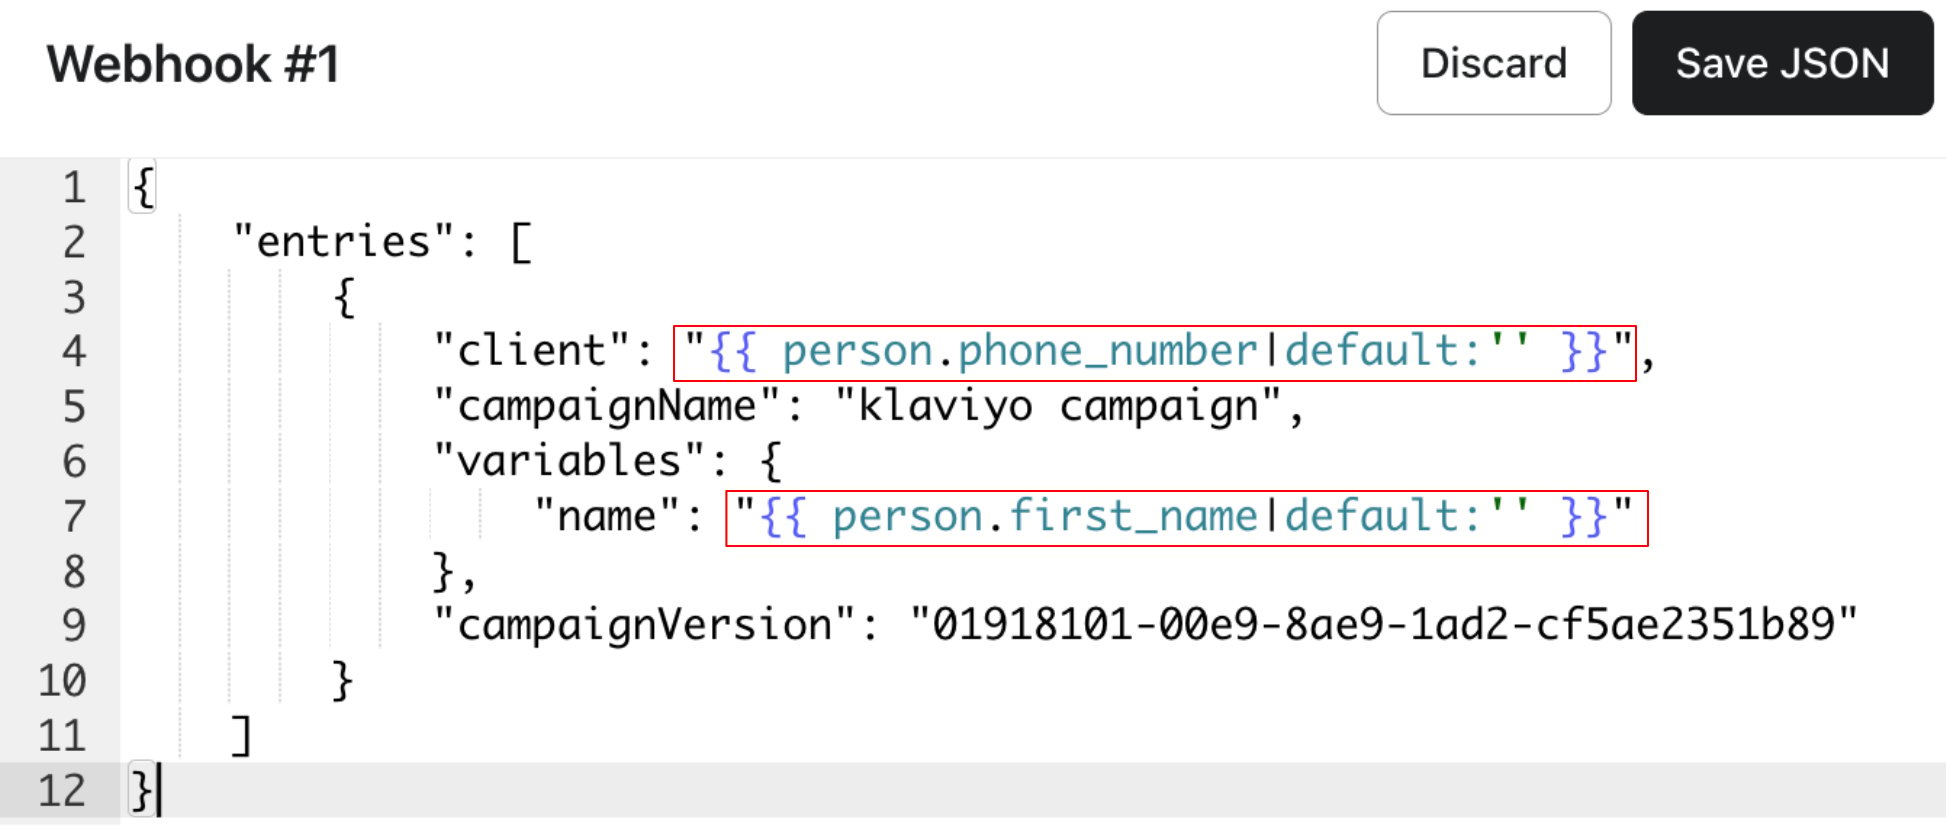
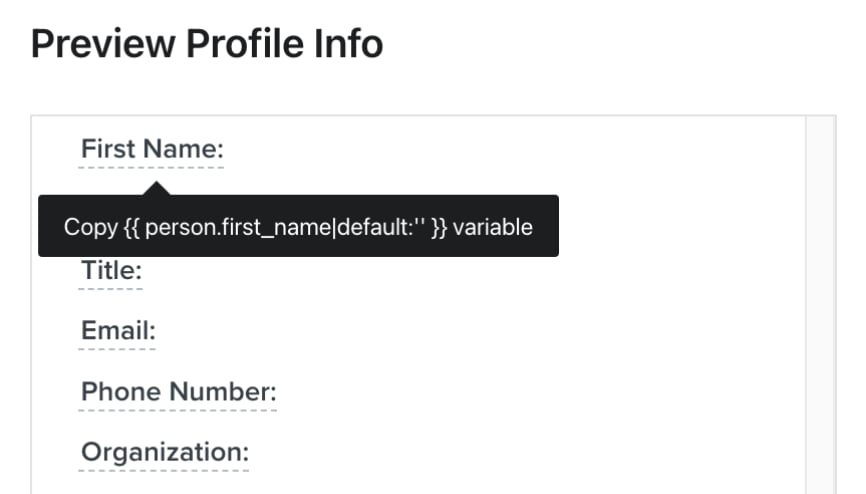 Go back to the JSON body and replace each placeholder with the corresponding Klaviyo variable. For example, replace `"CHANGE_TO_TARGET_PHONE_NUMBER"` with `"{{ person.phone_number|default:'' }}"` and `"CHANGE_TO_VALUE"` with `"{{ person.first_name|default:'' }}"`.
 Repeat for every variable in the payload.
***
### Step 6: Test and activate the flow
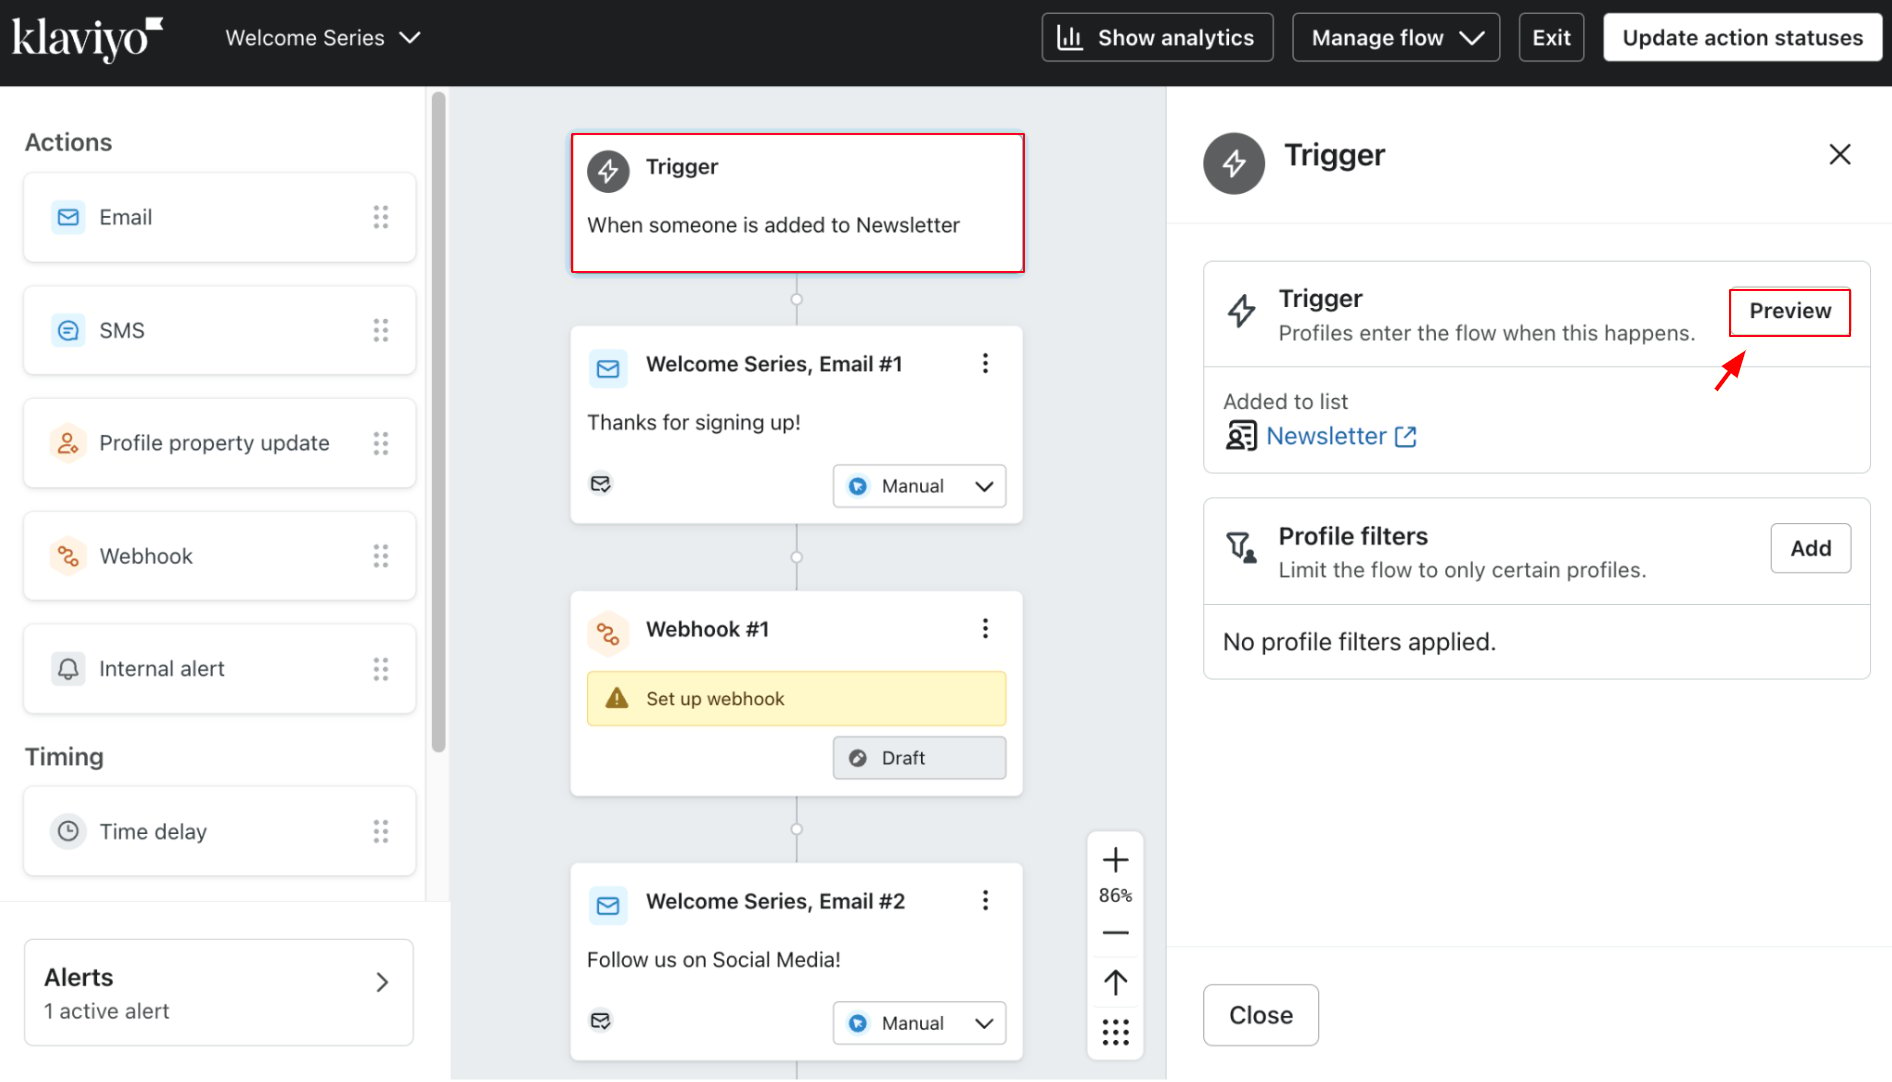
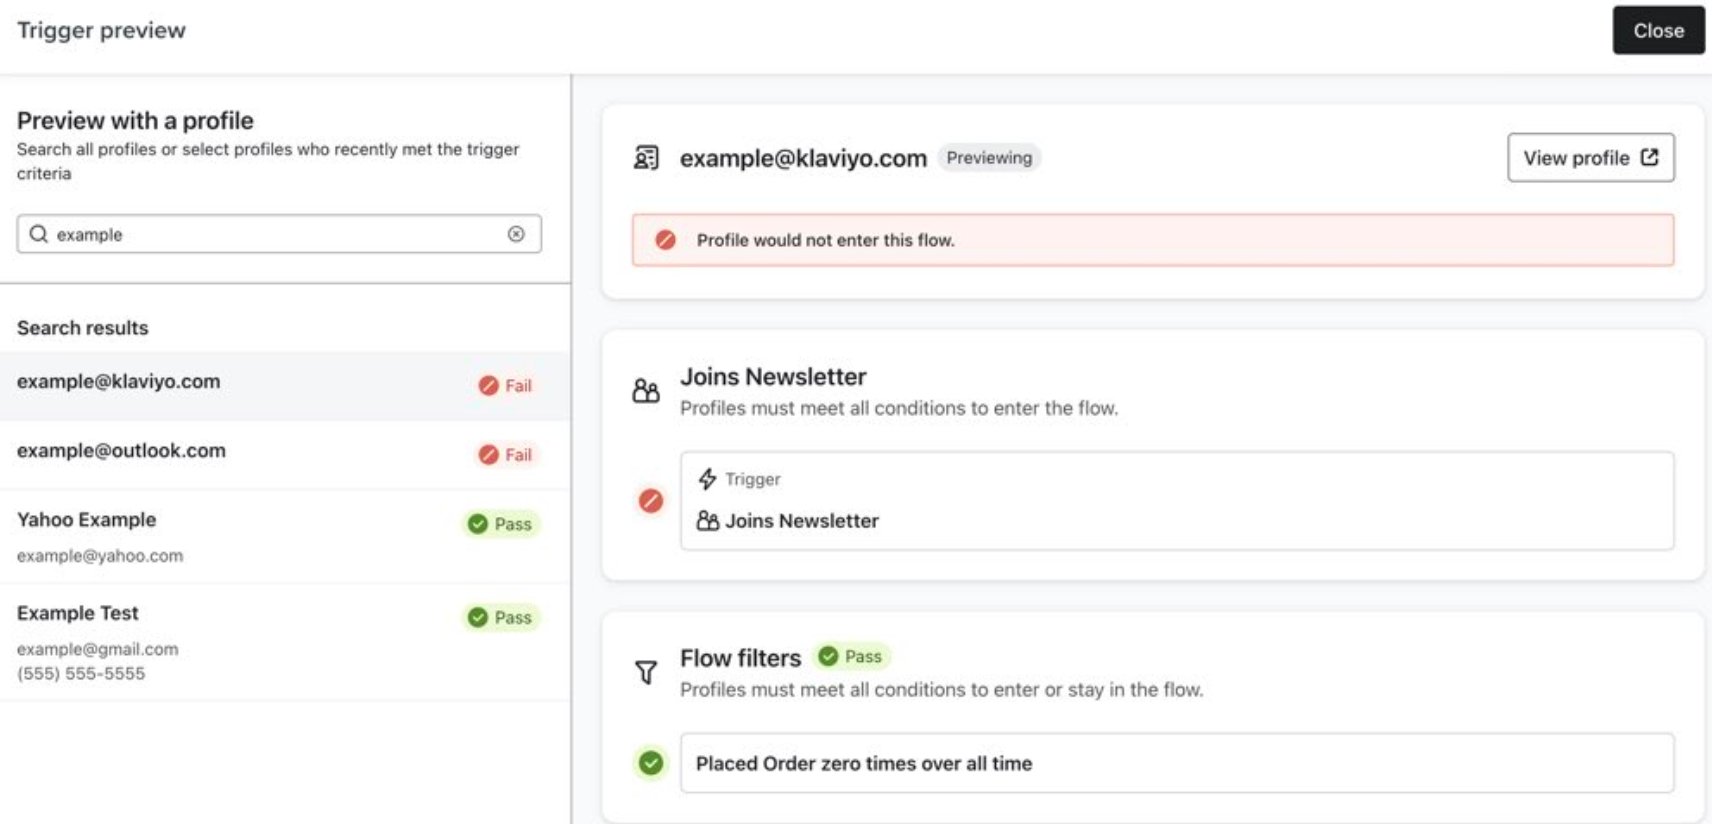
Click the **Trigger** node to open its settings panel, then click **Preview**. The Trigger Preview tool shows which profiles would enter the flow and whether they pass your filters. Use the search bar to look up a specific test user.
Repeat for every variable in the payload.
***
### Step 6: Test and activate the flow
Click the **Trigger** node to open its settings panel, then click **Preview**. The Trigger Preview tool shows which profiles would enter the flow and whether they pass your filters. Use the search bar to look up a specific test user.
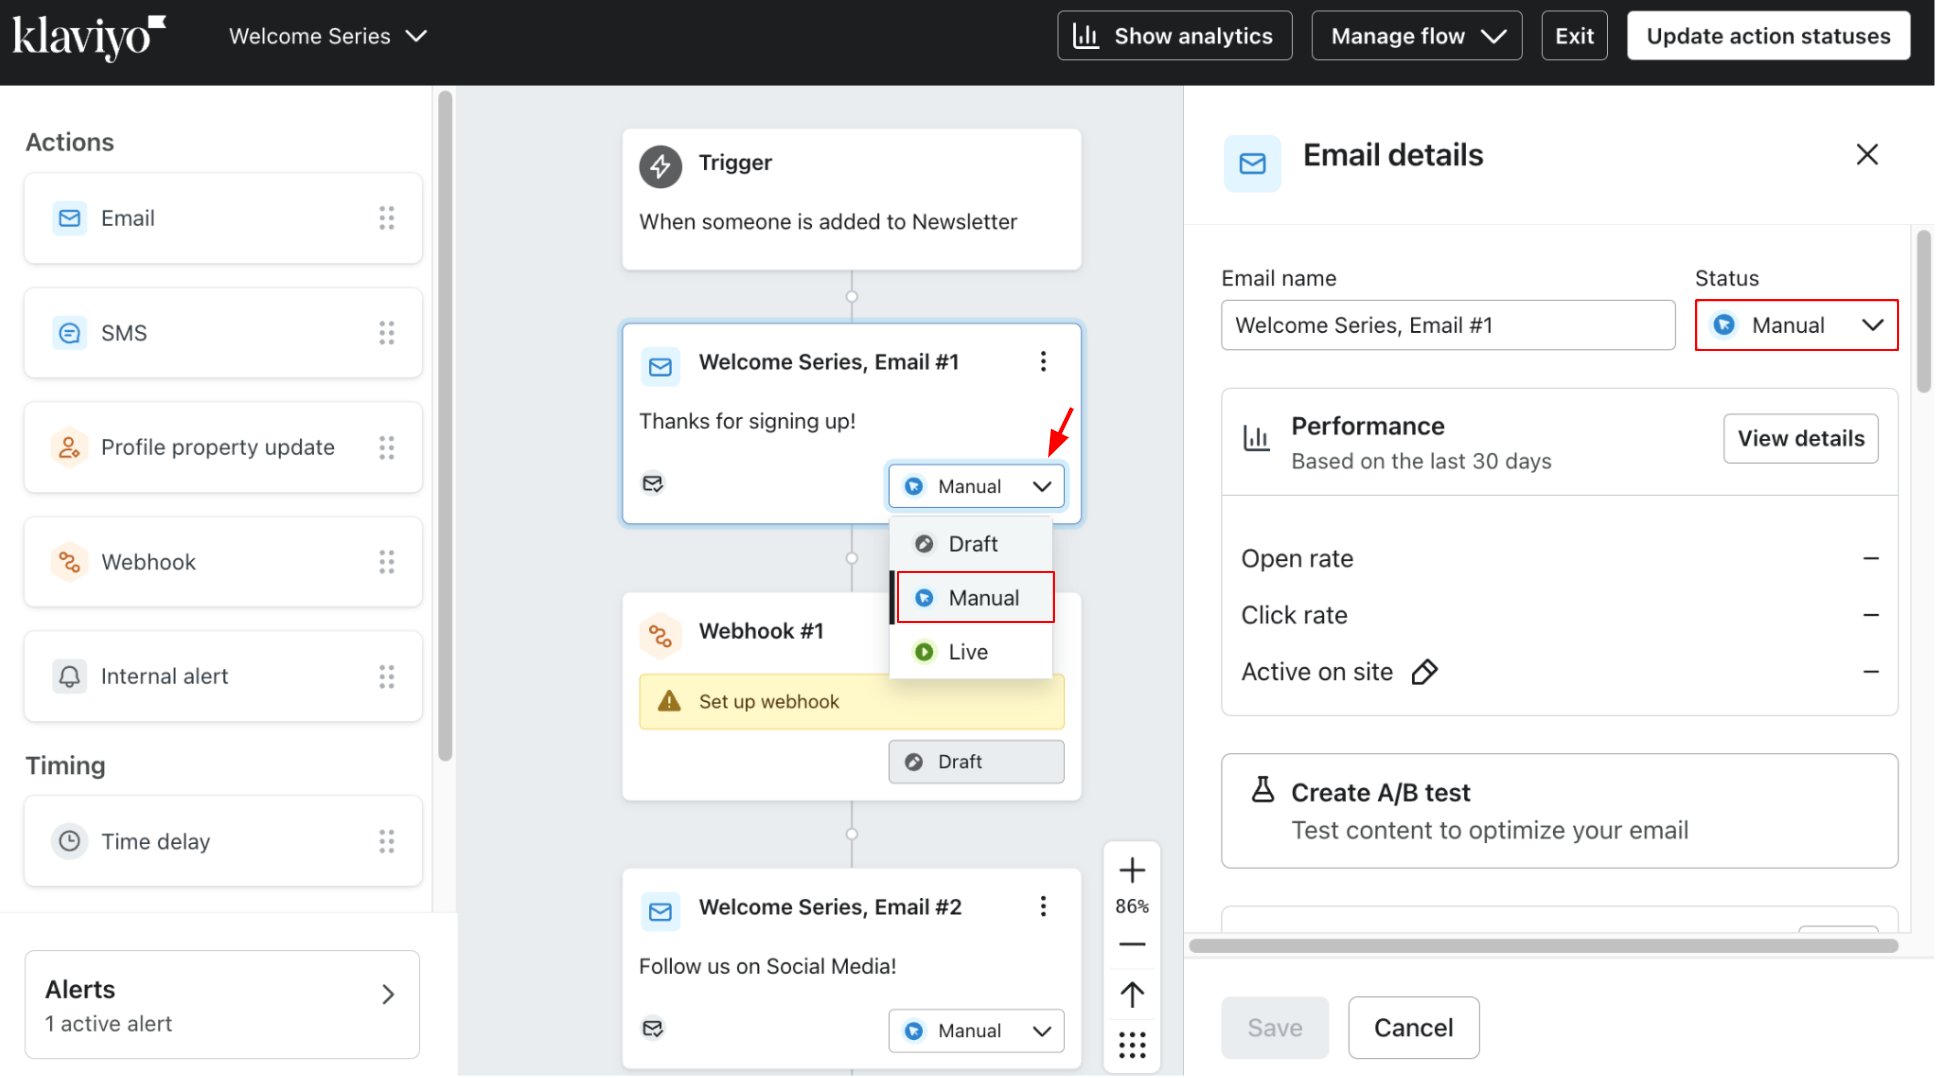
 Click on a flow message node to open its details. Change the status dropdown from **Draft** to **Manual**. In Manual mode, messages are scheduled as if live but held for your review instead of being sent automatically.
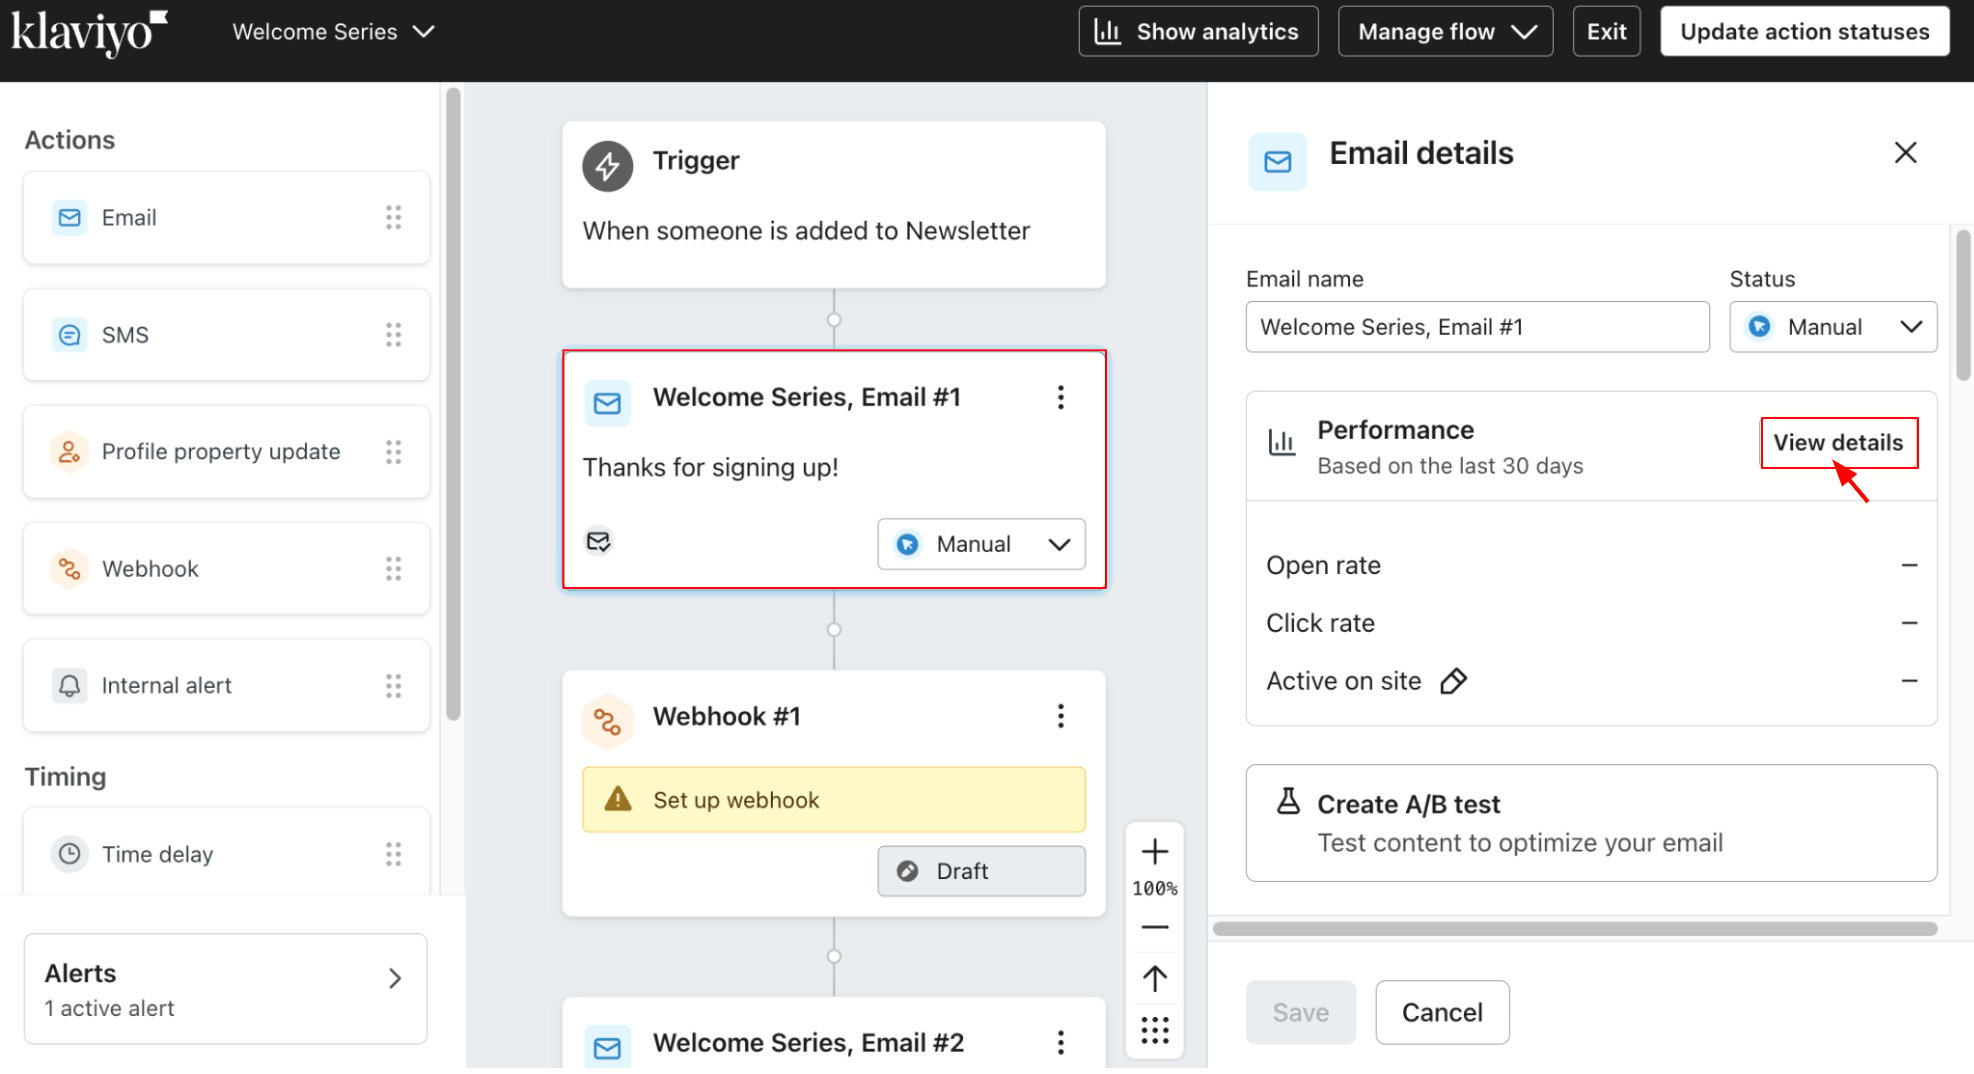
 Select the flow message and click **View details** in the Performance section of the right sidebar.
 Navigate to the **Recipient activity** tab and click **Needs review**. A list of eligible recipients appears — you can approve or cancel sends individually or for the entire list.

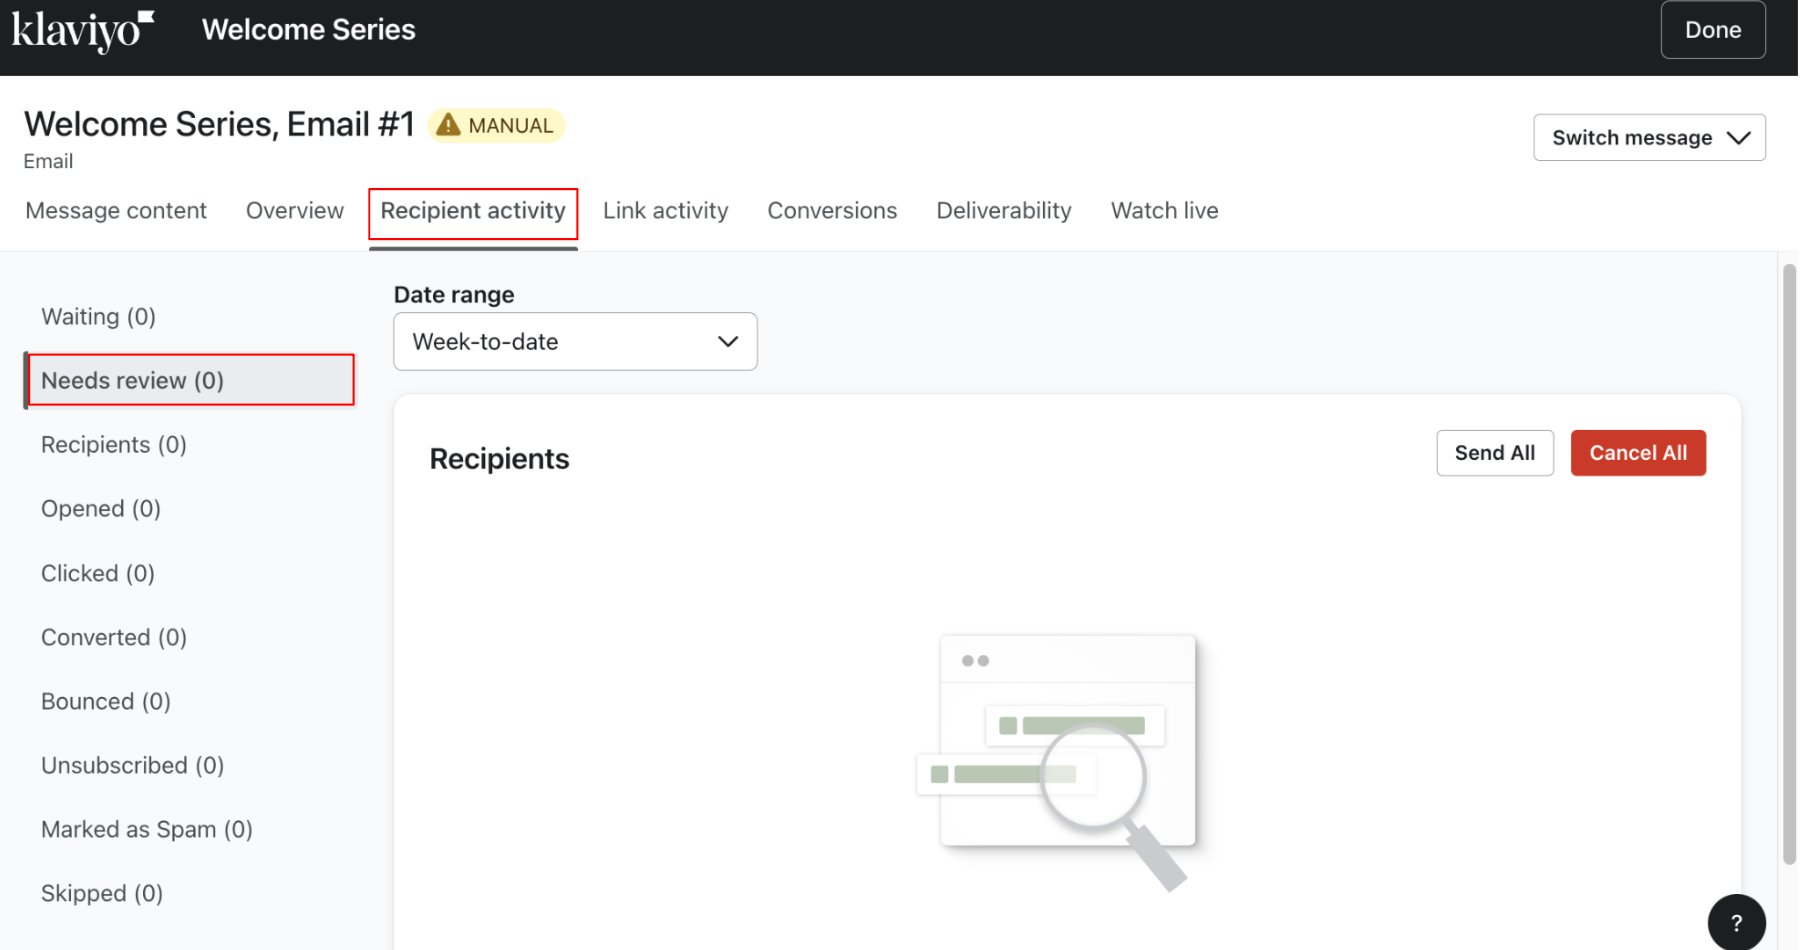 When a message status is updated from Manual to Live, recipients in **Waiting** will receive the message automatically at send time. Recipients in **Needs Review** will still require manual approval.
Once you've finished building and testing, click **Save** and then **Review and turn on** in the top right corner.
Check the tutorial video here: [How to adjust variables at Klaviyo](https://drive.google.com/open?id=1qT15UA5qzrdAhgV_TKN89VJm-ZaU8pl7)
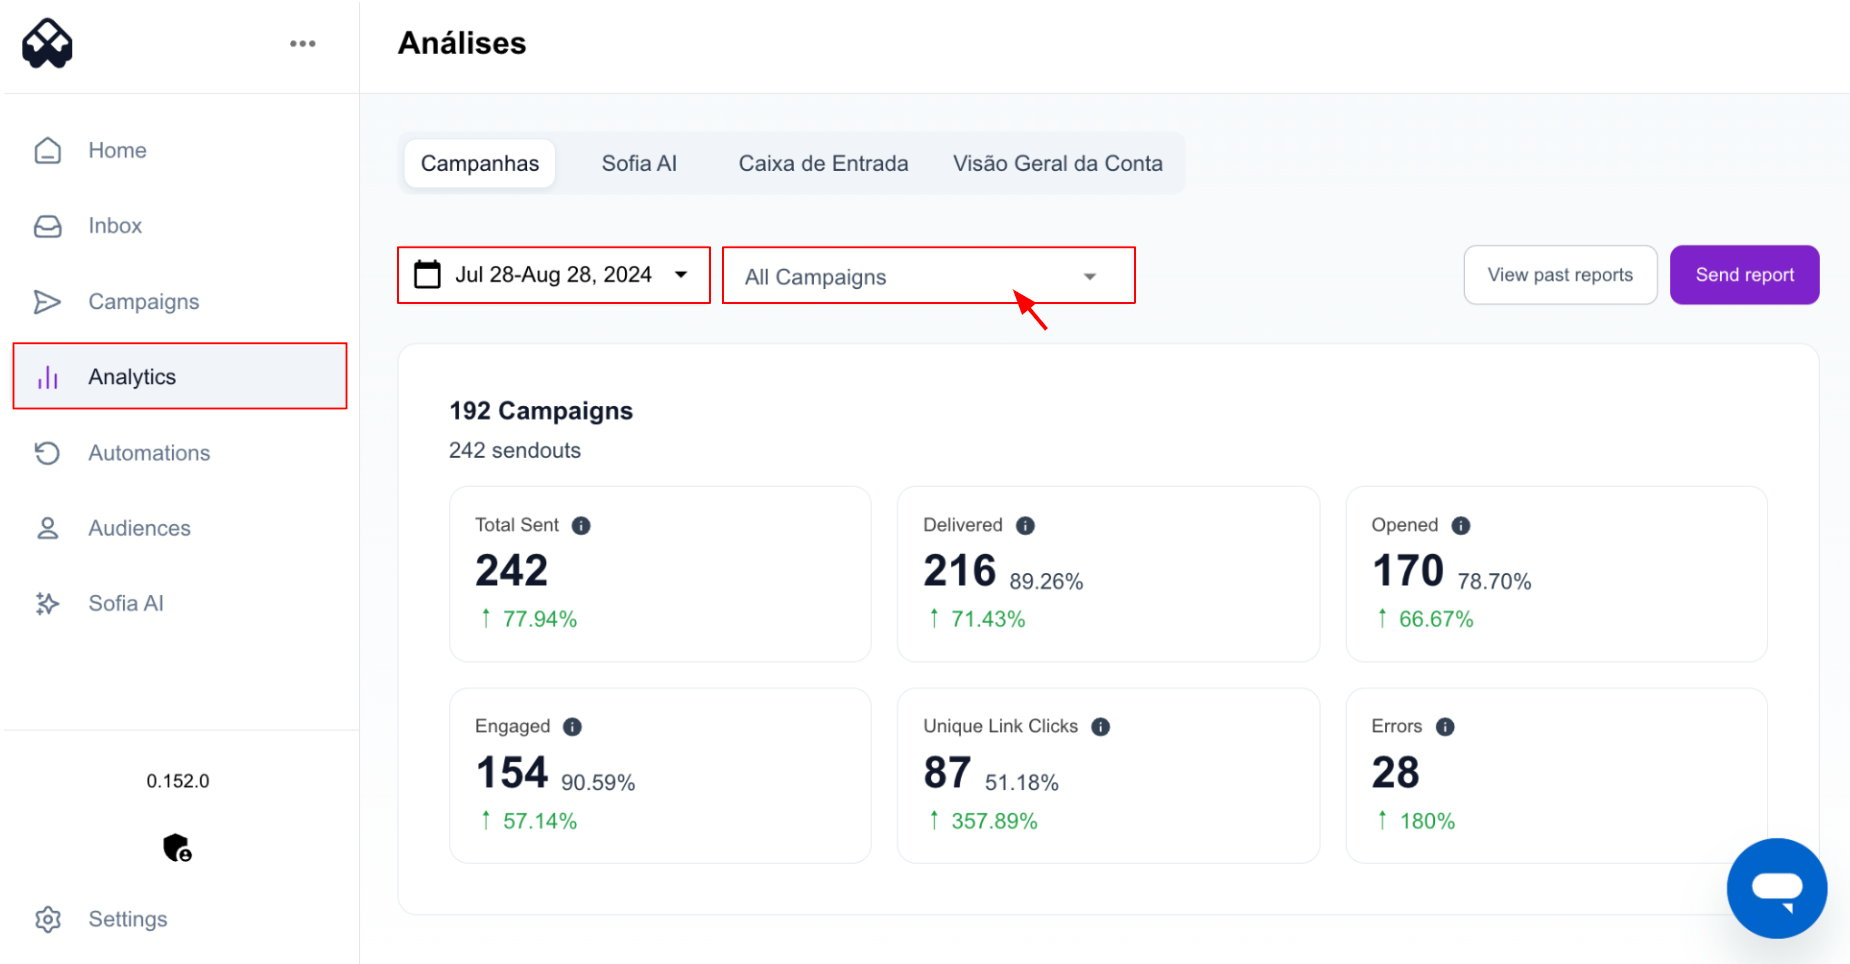
## Analytics
Campaign results and key metrics are available in the Connectly platform under **Analytics**. Select your campaign and timeframe to view delivery, engagement, and performance data.
When a message status is updated from Manual to Live, recipients in **Waiting** will receive the message automatically at send time. Recipients in **Needs Review** will still require manual approval.
Once you've finished building and testing, click **Save** and then **Review and turn on** in the top right corner.
Check the tutorial video here: [How to adjust variables at Klaviyo](https://drive.google.com/open?id=1qT15UA5qzrdAhgV_TKN89VJm-ZaU8pl7)
## Analytics
Campaign results and key metrics are available in the Connectly platform under **Analytics**. Select your campaign and timeframe to view delivery, engagement, and performance data.